
This is an old revision of the document!
Table of Contents
PIDI PBR Skin + Eye Shader (Legacy Edition)
###
This package contains a set of realistic and highly detailed skin and eye shaders for 2017.1 and above, compatible with forward and deferred rendering paths as well as with the new Lightweight SRP. Mobile versions of the skin shader are also provided.
###
###
This skin shader includes advanced features oriented towards high-end art assets and games, such as tessellation, full subsurface scattering and translucency, dynamic bone/blendshape driven wrinkles and much more.
###
###
In this manual we will cover all the basics so you can get started and using these advanced Skin and Eye Shaders in no time.
###
###
We thank you very much for purchasing our product and hope that PIDI – PBR Skin + Eye Shaders will help you make amazing games.
###
Quick Start Guide
Installation
### While PIDI : PBR Skin + Eye Shader has been designed to be integrated to any project at any stage of development with little to no setup required, there are still some considerations to be made ###
Standard Pipeline Projects
###
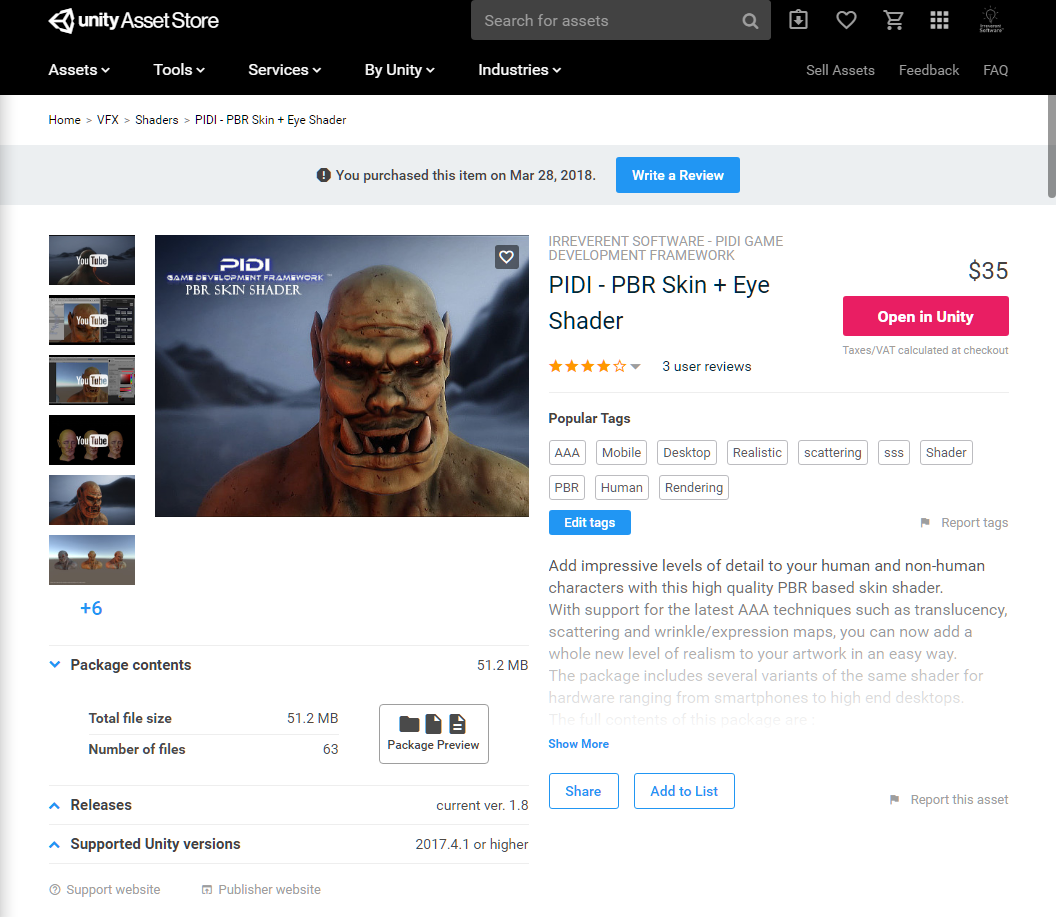
For projects working with the Standard Pipeline there is little to no setup required. If this is a first time installation you just need to head to the Asset Store and find this asset either under the section “My Assets” or by a normal search in the store itself.
###
###
If you have bought the asset, a Download / Import / Update button will show, depending on if you have never downloaded the asset before, you have downloaded it and it is in cache already or there is a new version available for download, respectively.
###
###
Once the import dialog appears, just import all the contents of the asset as usual. To verify that the asset was imported without any errors try to open one of the demo scenes. If they work without issues, the package has been imported correctly. If you see any graphical errors you must re-import the asset. If the issues persist even with a brand new and empty project, please contact us at our support email
###
LWRP Projects
###
In the last step described above, once you see the import dialog while adding this asset to your project, DO NOT import the Standard Pipeline folder to your project. Importing this folder would cause errors due to the shaders and materials included in it being incompatible with LWRP.
###

###
Instead, once the tool has been fully imported, unpack LWRP 5.7.unitypackage (which is located inside the LWRP Contents folder) into the project or the LWRP 6.9.unitypackage file if you are working on Unity 2019.2 and import its contents. This will add all the necessary shaders, demo scenes and additional files for you to start using PIDI PBR Skin + Eye Shader in Unity 2019.1+ with LWRP 5.7+
###

### While we do our best to keep up to date with LWRP releases there may be times when Unity updates their pipelines and adds or removes functionality from them (and in most cases breaking the compatibility of LWRP shaders) before we can issue the corresponding update. If your version of LWRP does not load the shaders appropriately or the demo scenes inside the LWRP Add on folder show pink materials please be patient, as we will issue the corresponding patch usually within 1-2 days of a new LWRP release or contact us to let us know the details of the error to our support email. ###
### Warning : Please remember to make a backup of your project before upgrading or installing any tool or asset. While we do our best to ensure that our software is free of errors and easy to use, we are not responsible for any loss of data, corrupted files or projects produced during the installation or use of this software. ###
### Once the asset has been successfully installed into your project, adding reflections to an existing scene is a simple process that can be done in just a few minutes. For more advanced uses and in-depth information about each feature please continue reading this documentation. ###
Basic Guide
###
The skin shaders included in this package have support for different features, different rendering methods and are oriented to different levels of hardware. Starting with version 1.2, these shaders are split into two main groups : Standard Pipeline and Lightweight SRP.
###
###
It is heavily recommended to upgrade your materials to the new versions of the shaders, since these are build and designed for continued support and improvement.
###
###
Starting with version 1.2 the skin shader has been completely redesigned and reworked to streamline its integration to any project, optimize it, make it usable in a wider variety of rendering pipelines and most importantly to guarantee that it can be built upon in future versions.
###
###
The shader has several groups of features, some basic and some advanced. The more advanced features require a more complex preparation of your art assets, such as the creation of specific skin data maps, high poly sculpts for wrinkle generation, HD texturing, high quality rigging etc. while the basic and general features can be used without any hassle in practically any model.
###
###
Let's learn how to use this shader by creating a new skin material for the Orc Demo model included with this asset.
###
Creating your first skin material
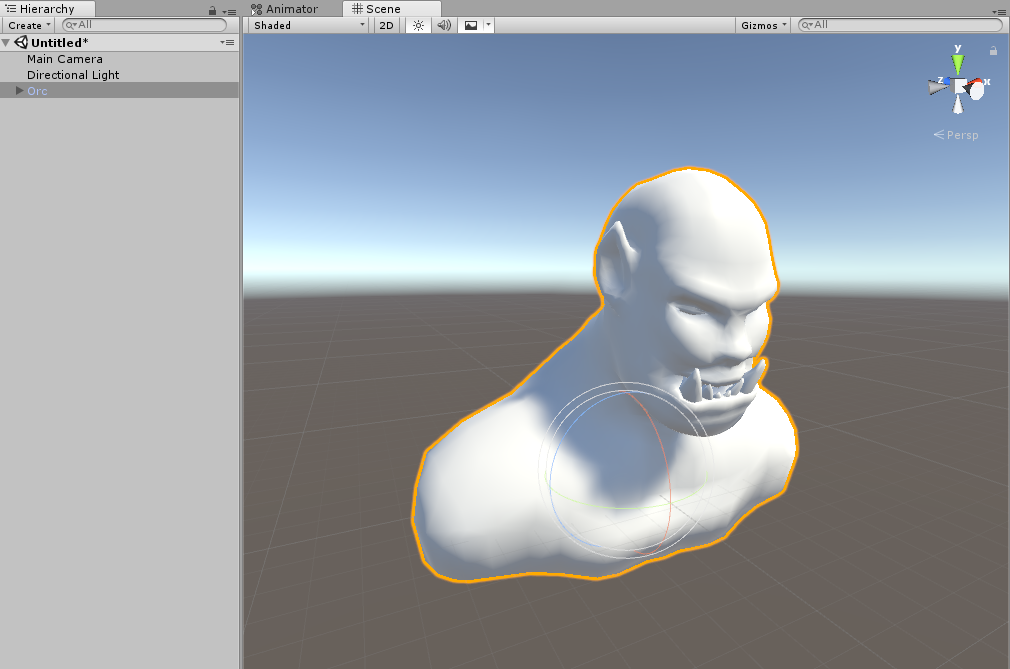
### First let's create a new scene and set your camera to render in Forward mode. Then, drag and drop the Orc model that you can find in the Demo_Assets/Orc Demo folder. ###
###
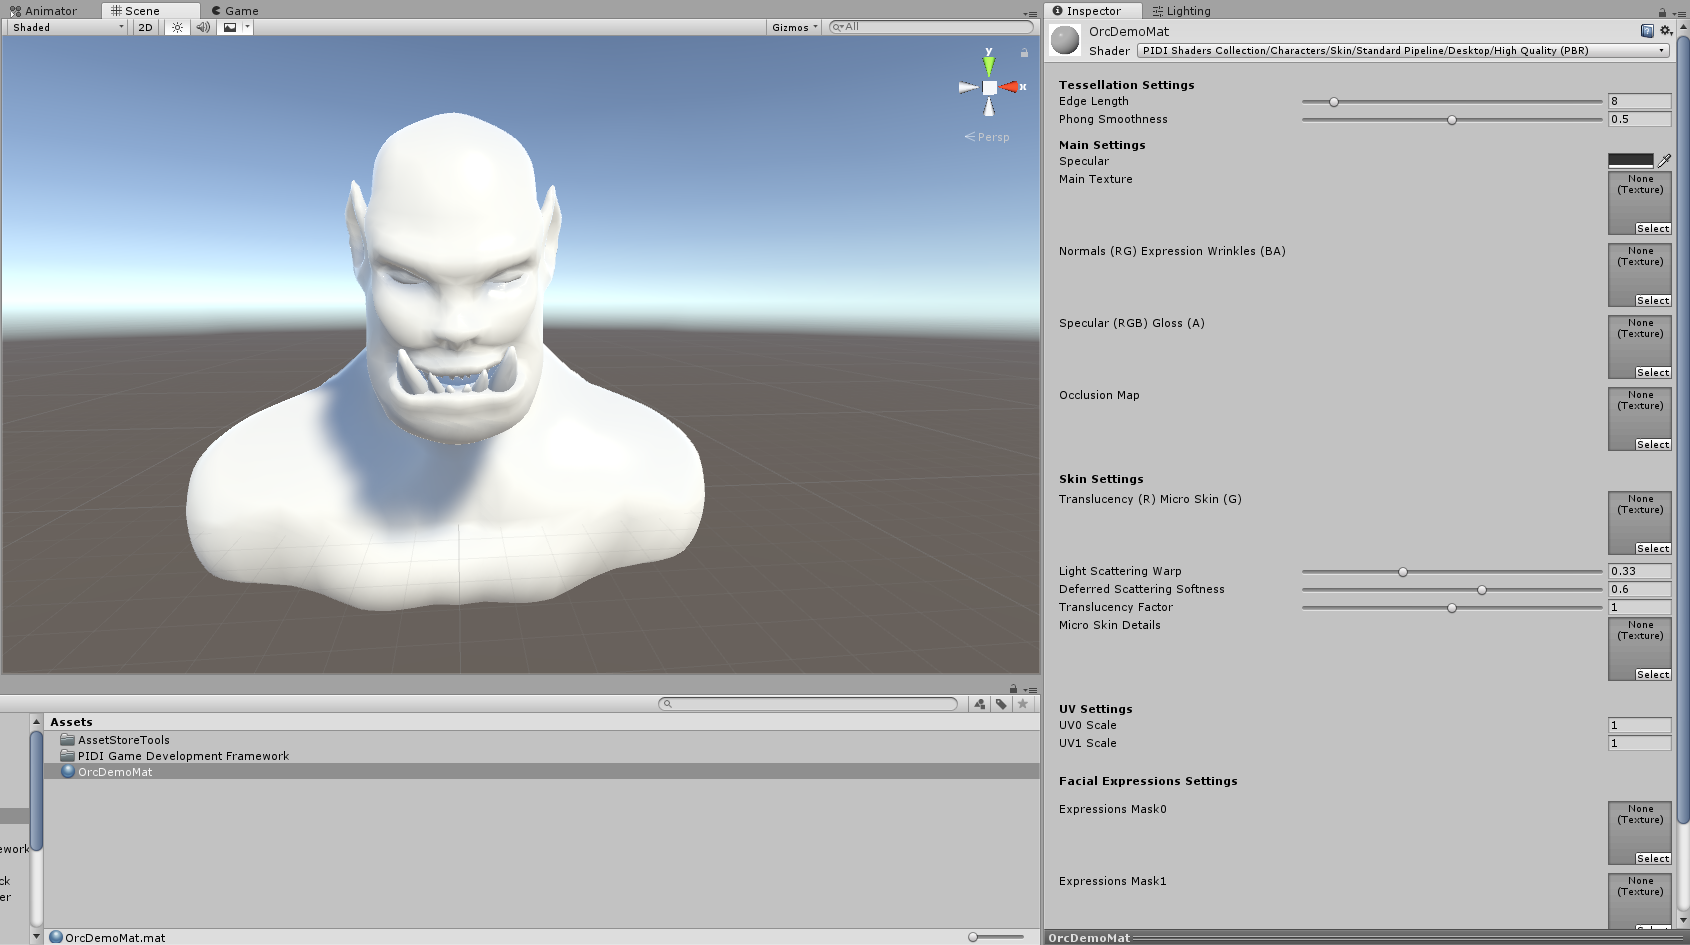
Now, create a new material in your project and select one of the included skin shaders for it. On “PIDI Shaders Collection/Characters/Skin/Standard Pipeline” you can find 2 different branches of shaders : Desktop and Mobile. For this tutorial, we will use the Desktop branch, select the High Quality (PBR) shader and assign the material to the orc.
###
### Now we will add a Micro Skin details texture to the shader. This texture adds small, soft normals across the surface and is used internally by the shader to simulate the finer imperfections of skin. Go to the Demo_Assets folder again, grab the MicroSkin texture included with this package and assign it to the Micro Skin Details slot in the material. ###
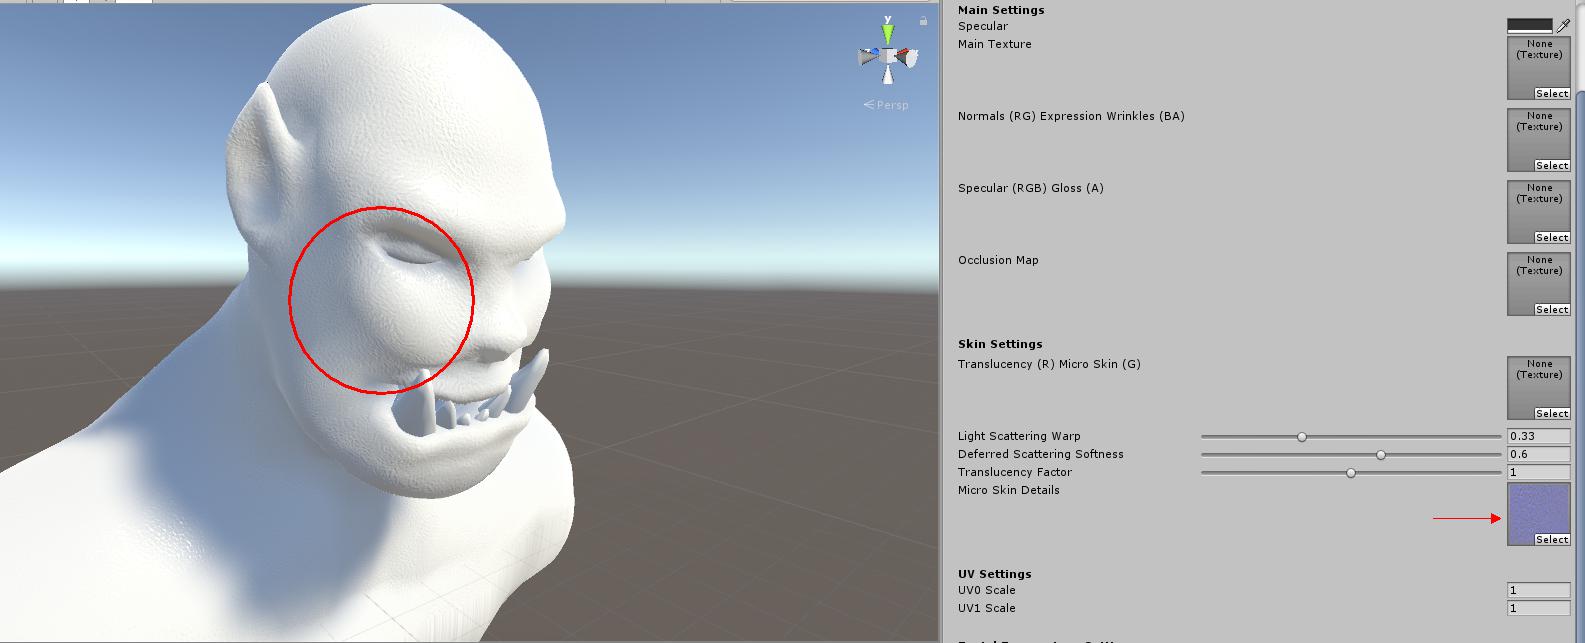
### As you can see, the surface of the mesh now has a correct lighting and it also shows the small, soft bumps found in real skin. The micro-skin details are projected onto the mesh using the secondary UV channel whenever it is present. You can adjust the tiling factor of the micro-skin details by changing the UV1 Scale. Right now it has a value of 1 but we will set it to 3 to make the details even smaller, since they should be most visible only during close ups. ### ### Let's add our other textures the same way we would do for any other material. We will assign our Orc_Albedo texture to the Main Texture slot and the Orc_NormalsMerged texture to the normals slot. Our model should look like this now : ###
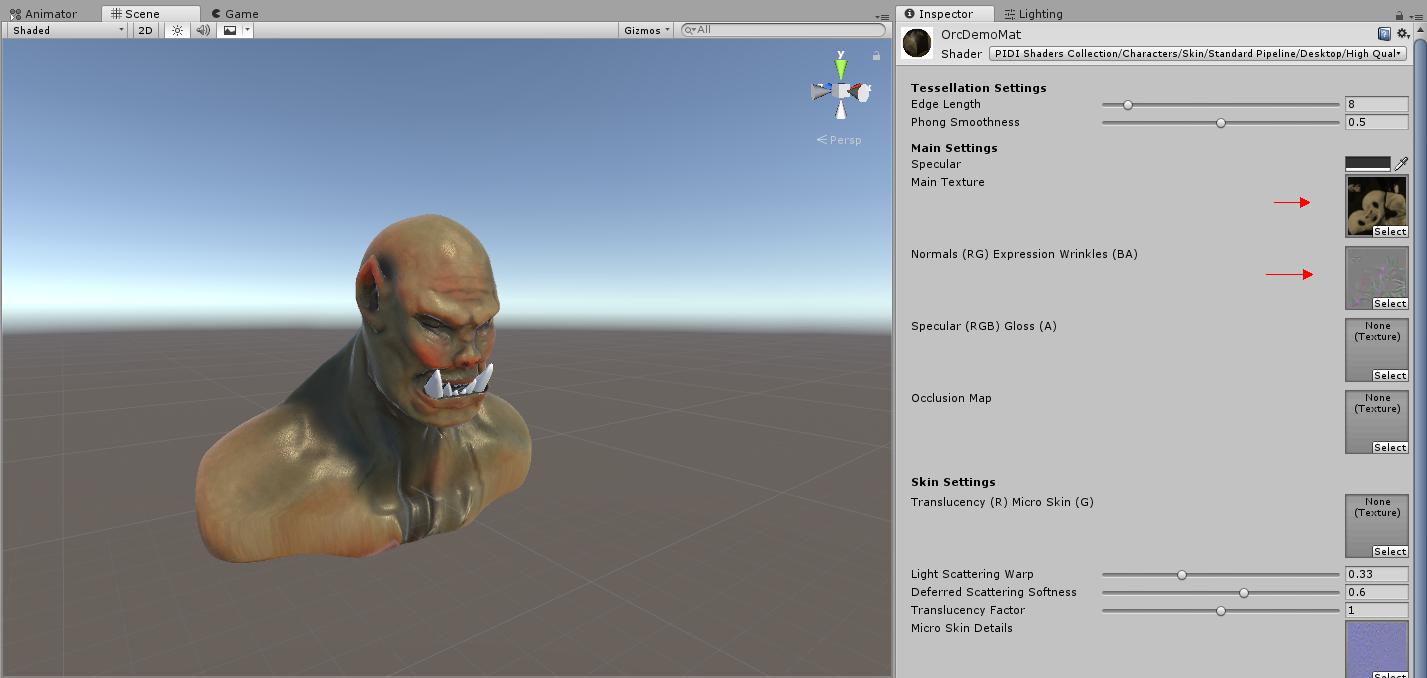
### As you can see, the smoothness of the model is too high, making it look like it has been under heavy rain or it is made of some kind of ceramic. ###
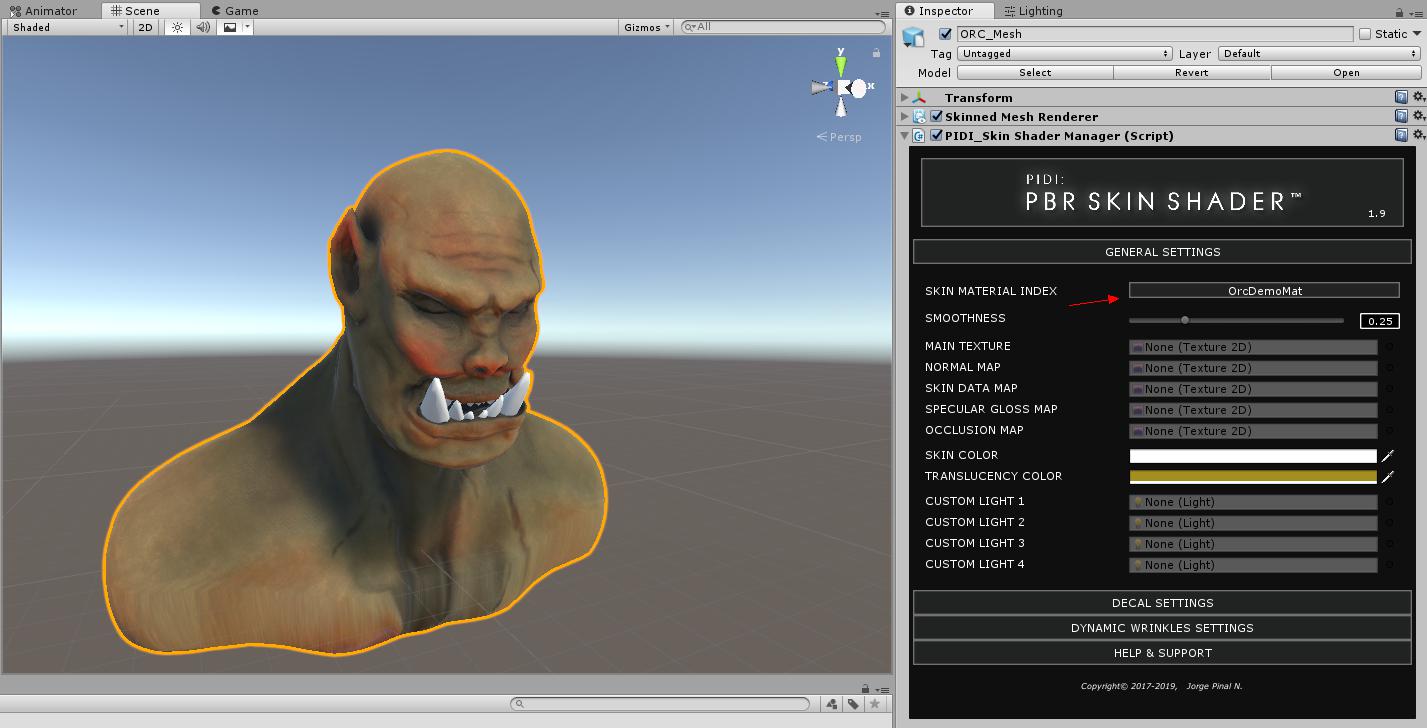
### You will notice as well that there are no options for smoothness nor skin color on the material. In fact, several key variables are missing. This is because our PBR Skin Shader has been designed with real, actual games in mind and, in an actual game, you may have dozens of instances of the same enemy type (let's say, a zombie) where the only differences between two of them would be the smoothness (if one of them is wet) and the skin color. ###
### With our shader, these and other properties are managed by the Skin Shader Manager, which allows you to modify them for each instance without having to create dozens or hundreds of material variations. ###
Let's learn now how to use it.
Skin Shader Manager
### First, select the Orc mesh in the hierarchy panel and add the PIDI_SkinShaderManager component to it. Open the General Settings tab and, from the drop down menu next to Skin Material Index select the material on your character that is using the Skin Shader ###
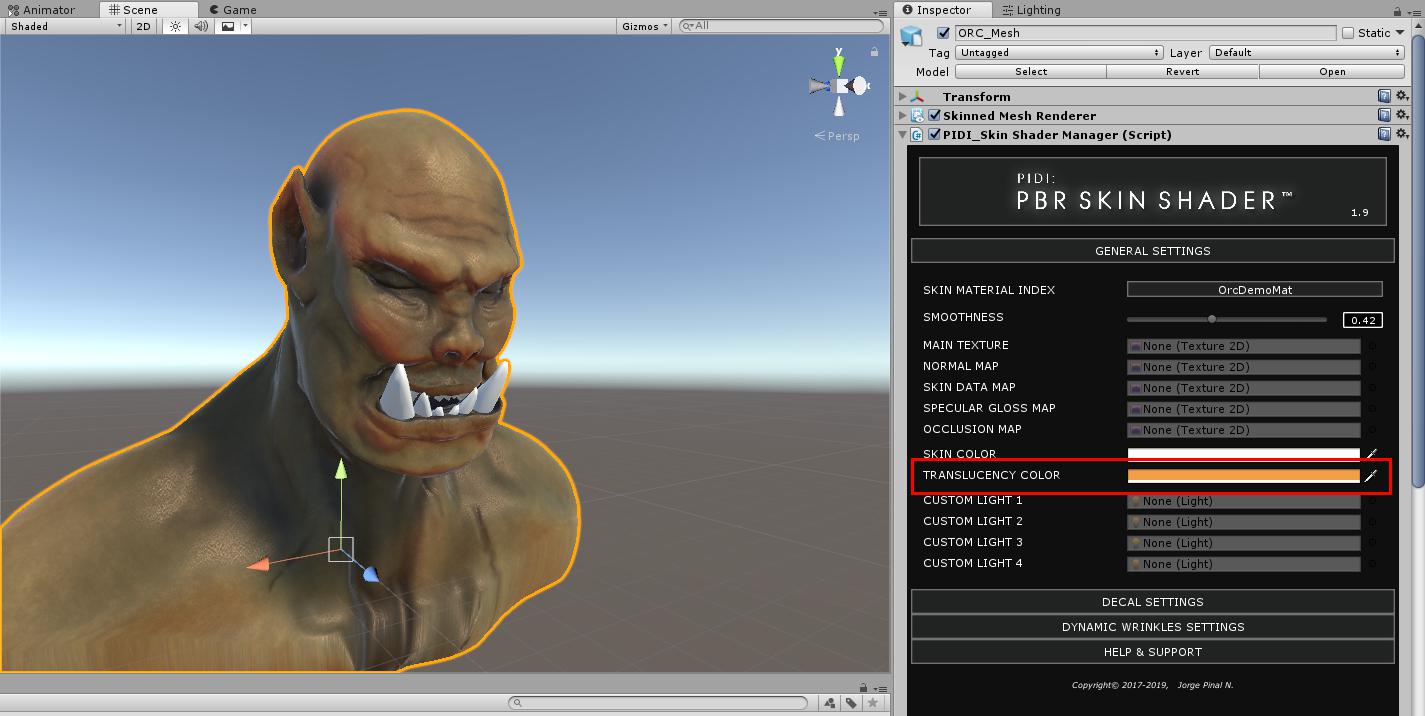
### If you move the smoothness slider, you can adjust the precise look you want for your skin. In this example, we will use a value of 0.4. If you adjust the skin color, you will see that the material responds immediately and that its appearance changes just like if you were manipulating the material directly. ### ### The translucency color allows you to have more control over the way the sub surface scattering and translucency of the skin works, allowing you to precisely control the color the light takes as it passes through the model. ###
### The four custom lights that you can see there are also used for Deferred and Lightweight modes. Due to their limited support for customization, these rendering pipelines cannot support translucency for an unlimited amount of lights the way Forward does. They have support for up to 4 lights, which can be defined in the Skin Shader Manager inspector or at runtime with the array lights[] accessing the indices 0 to 3. ###
### Before we leave the Skin Manager inspector, let's add some decals. ###
Decal / Overlay Textures
### Open the Decal Settings tab on the inspector. You will see settings for the decal textures to use, the UV Channels they will use, their smoothness, specular and alpha values. ### ### Let's assign the Orc_DecalBlood texture as our first Decal. You will see the blood appear on the surface of the model immediately. Let's increase the smoothness of this decal and make the Specular color almost black so our blood looks more like a fresh wound. ###
