
Table of Contents
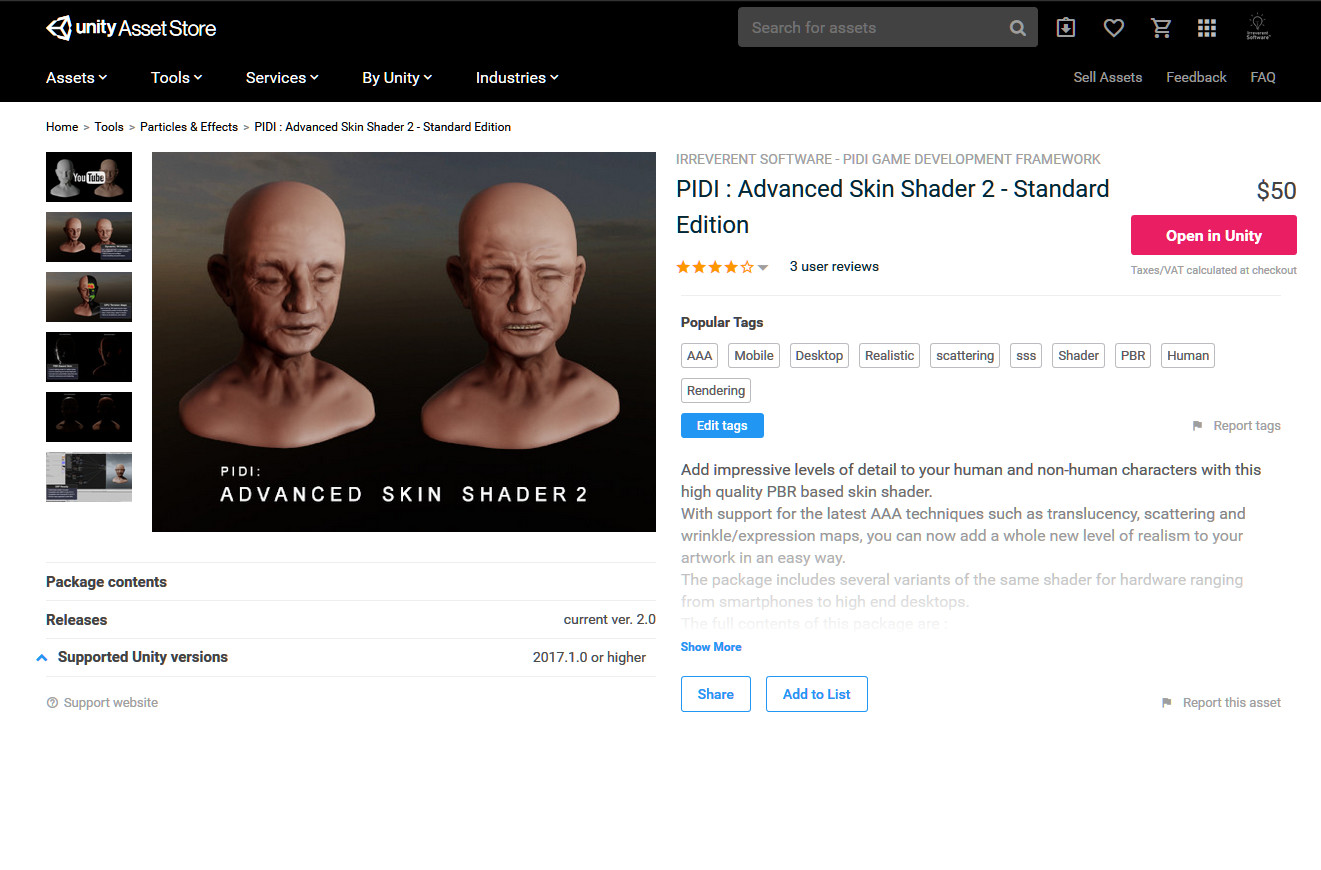
PIDI : Advanced Skin Shader 2
PIDI : Advanced Skin Shader 2 is a collection of shaders, tools and scripts that allow you to add realistic AAA skin materials with full PBR support and dynamic wrinkles to your characters on multiple platforms and on the Standard, Lightweight and Universal Pipelines.
With unparalleled realism and advanced features such as real-time translucency, subsurface scattering, dynamic wrinkles through both region and GPU tension maps, support for LWRP and Universal RP as well as compatibility all kinds of devices from mobile to high-end desktop, PIDI :Advanced Skin Shader 2 is the asset you need to take your characters to a new level of realism
Standard vs Lite Edition
PIDI : Advanced Skin Shader 2 is available in two different editions which may adapt to all kinds of teams and budgets. A Lite edition with only the essential features is offered at a much lower price while the fully featured Standard edition is targeted to projects and developers that may need more advanced features out of this skin rendering system.
Below you can see a comparison table showing the full feature set of each edition. The Lite edition has an additional module that adds LWRP / Universal RP support in Unity 2019.2+ (this module is included in the Standard edition). To learn more about the specific limits and differences between the standard Unity rendering pipeline (also known as Built-in) and the new LWRP / Universal RP pipeline, please go to the corresponding section of the documentation.
| Feature | Advanced Skin Shader 2 Lite | Advanced Skin Shader 2 Standard |
|---|---|---|
| Source Code Access | ✓ | ✓ |
| Forward rendering support | ✓ | ✓ |
| Deferred rendering support | ✓ | ✓ |
| Integrated overlay/decal FX | ✓ | ✓ |
| Dynamic wrinkles support | X | ✓ |
| Simple Tessellation support | X | ✓ |
| “Stylized Skin” shaders | X | ✓ |
| “Cartoon Skin” shaders | X | ✓ |
| LWRP / Universal RP support | Sold separately | ✓ |
| HDRP Support | X | ✓ |
| Mobile ready variants | Sold separately | ✓ |
LWRP / Universal RP vs Built in Forward vs Built in Deferred
The SRP feature (LWRP/URP) is a new rendering pipeline introduced in Unity 2018.1 and currently in development. It has been marked as stable in Unity 2019 but it still receives frequent updates, feature changes, bug fixes etc.
Because of its “in-development” nature, compatibility-breaking bugs and serious performance issues can be expected while using this tool alongside LWRP, which will be solved as the rendering pipeline itself becomes more stable and usable.
Furthermore, some limitations in the way lighting passes are handled in deferred mode within the Built-in Standard renderer change the way the shader will work between Forward and Deferred
| Feature | LWRP / URP / HDRP | Built-in Forward | Built-in Deferred |
|---|---|---|---|
| Real-time translucency | ✓ | ✓ | Up to 4 lights |
| Subsurface Scattering | ✓ | ✓ | Up to 4 lights |
| Tension map (GPU) wrinkles | ✓ | ✓ | ✓ |
| Region map (CPU) wrinkles | ✓ | ✓ | ✓ |
| Shadowed Translucency | ✓ | ✓ | X |
| Two UV wrapped decals | ✓ | ✓ | ✓ |
Quick Start Guide
While this guide and the documentation itself have been written with the full version of the asset in mind, most of the concepts and workflows described can be used directly on the Lite version as well. Features exclusive to the Standard version are marked as such.
Installation and upgrade
In this quick guide we will go through the whole process of using PIDI : Advanced Skin Shader 2, from installing the software into your project to adding it to a scene.
As a first step, please ensure that your project fully meets the requirements below :
- It is being developed with Unity 2017.1+
- If it uses LWRP, make sure it is using a compatible version
While PIDI : Advanced Skin Shader 2 has been designed to be integrated to any project at any stage of development with little to no setup required, there are additional steps to follow if you are using SRP (Lightweight or Universal).
Standard Pipeline Projects
For projects working with the Standard Pipeline there is little to no setup required. If this is a first time installation you just need to head to the Asset Store and find this asset either under the section “My Assets” or by a normal search in the store itself.
If you have bought the asset, a Download / Import / Update button will show, depending on if you have never downloaded the asset before, you have downloaded it and it is in cache already or there is a new version available for download, respectively.
Once the import dialog appears, just import all the contents of the asset as usual. To verify that the asset was imported without any errors try to open one of the demo scenes. If they work without issues, the package has been imported correctly. If you see any graphical errors you must re-import the asset. If the issues persist even with a brand new and empty project, please contact us at our support email
LWRP Projects
If you are using the Standard Edition or have purchased the SRP Add-on for the Lite version you must follow additional steps before using this asset in a LWRP / URP compatible project.
In the last step described above, once you see the import dialog while adding this asset to your project, DO NOT import the Standard Pipeline folder nor the Mobile Add on folder to your project. Importing this folder would cause errors due to the shaders and materials included in it being incompatible with LWRP / URP.

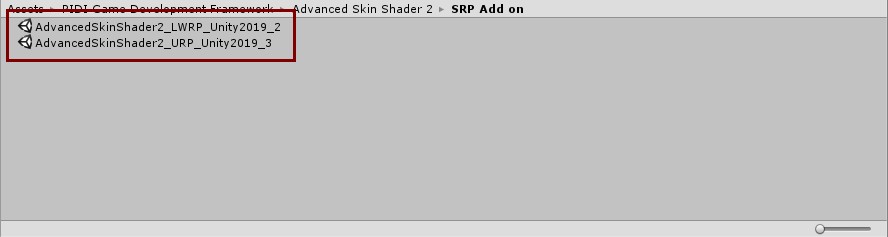
Instead, once the tool has been fully imported, unpack the package that matches the Unity version you are using. Please remember to update your SRP version to the latest release before using our shaders, and to open them with ShaderGraph and press the Save Asset button in the Graph Editor to ensure they upgrade automatically to the SRP version you are using.
While we do our best to keep up to date with LWRP releases there may be times when Unity updates their pipelines and adds or removes functionality from them (and in most cases breaking the compatibility of LWRP shaders) before we can issue the corresponding update. If your version of LWRP does not load the shaders appropriately or the demo scenes inside the LWRP Add on folder show pink materials please be patient, as we will issue the corresponding patch usually within 1-2 days of a new LWRP release or contact us to let us know the details of the error to our support email.
Setting up the skin shader on a character model
Adding the skin shader to a character model requires several steps. The Advanced Skin Shader is not a simple material nor can be simply dragged and dropped into an existing character due to the many additional features it has that do not exist on normal Unity materials.
In this short tutorial we will guide you through the whole process of adding the skin shader to a model and set up its basic properties. More advanced topics and features will be covered in the next sections.
In an empty scene, add the Old Man model included with the asset and place it in the center of the scene in position 0,0,0 and rotation 0,0,0. This setup is important to ensure that the mesh is set up correctly for the initial workflow. Make sure that your scene is running in Forward Mode. We will cover the set up for deferred in a later section.
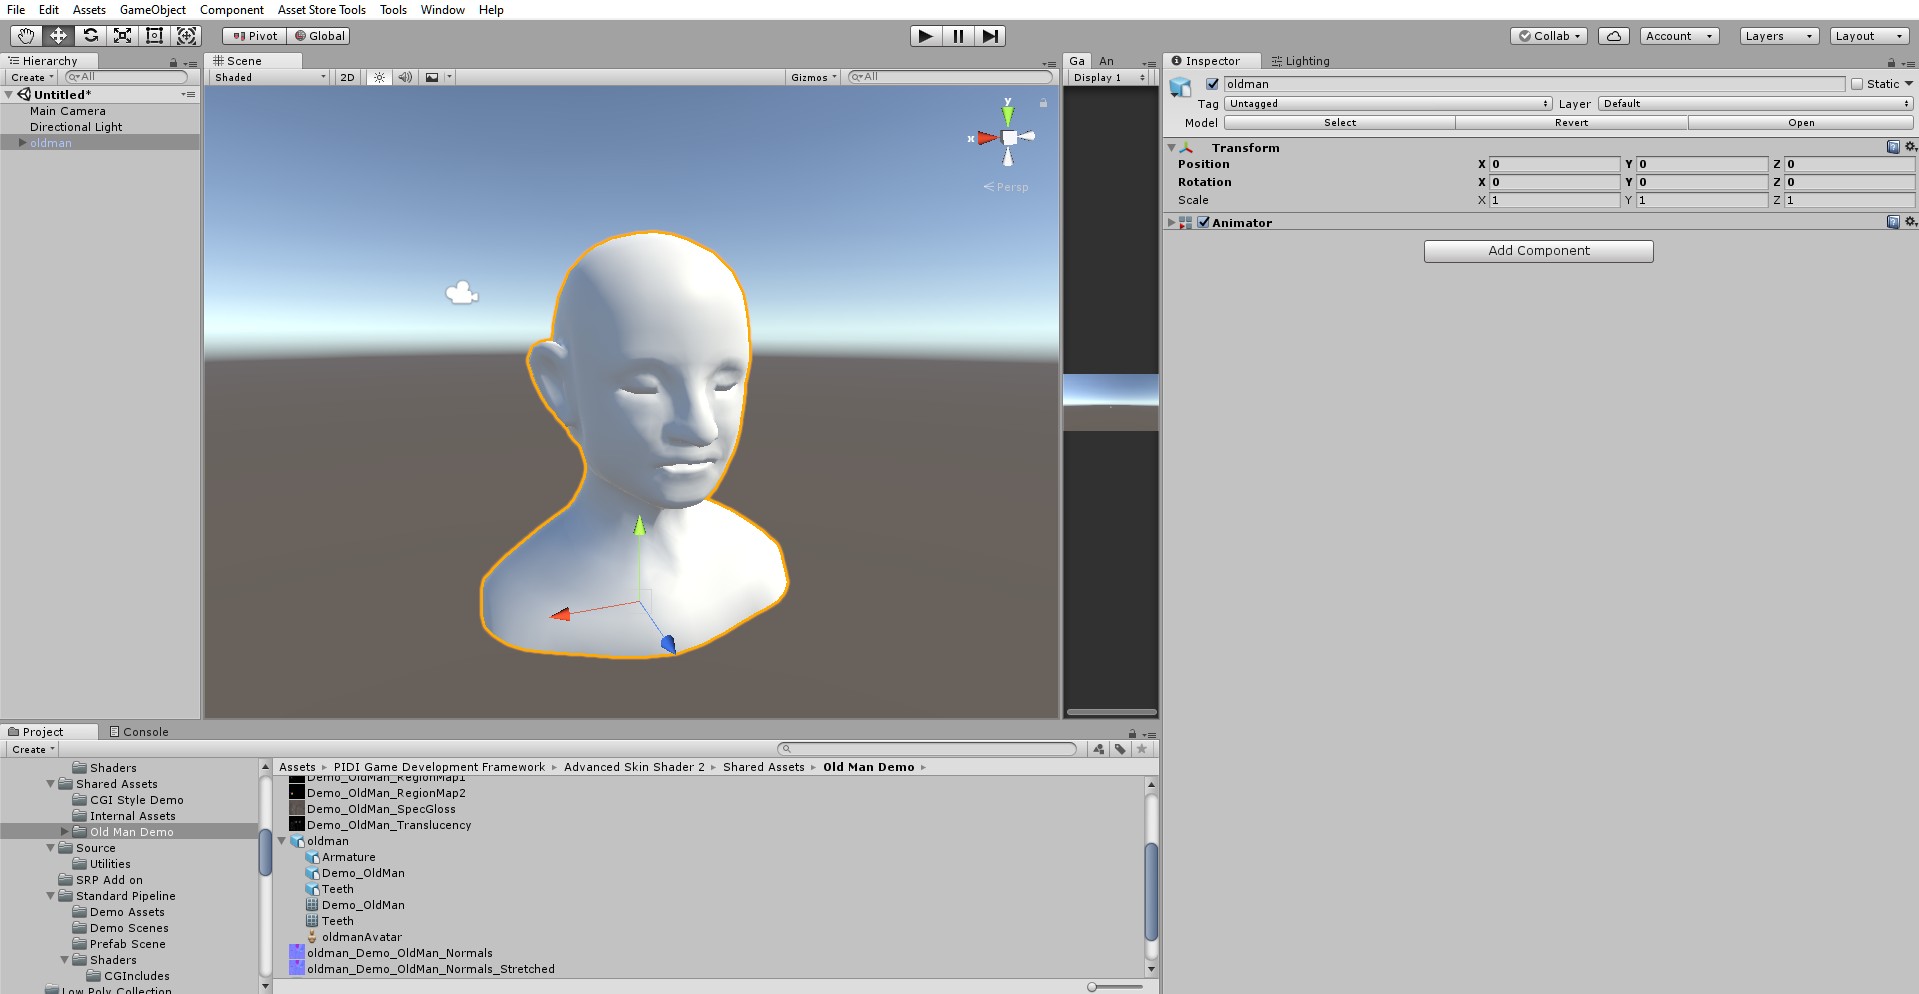
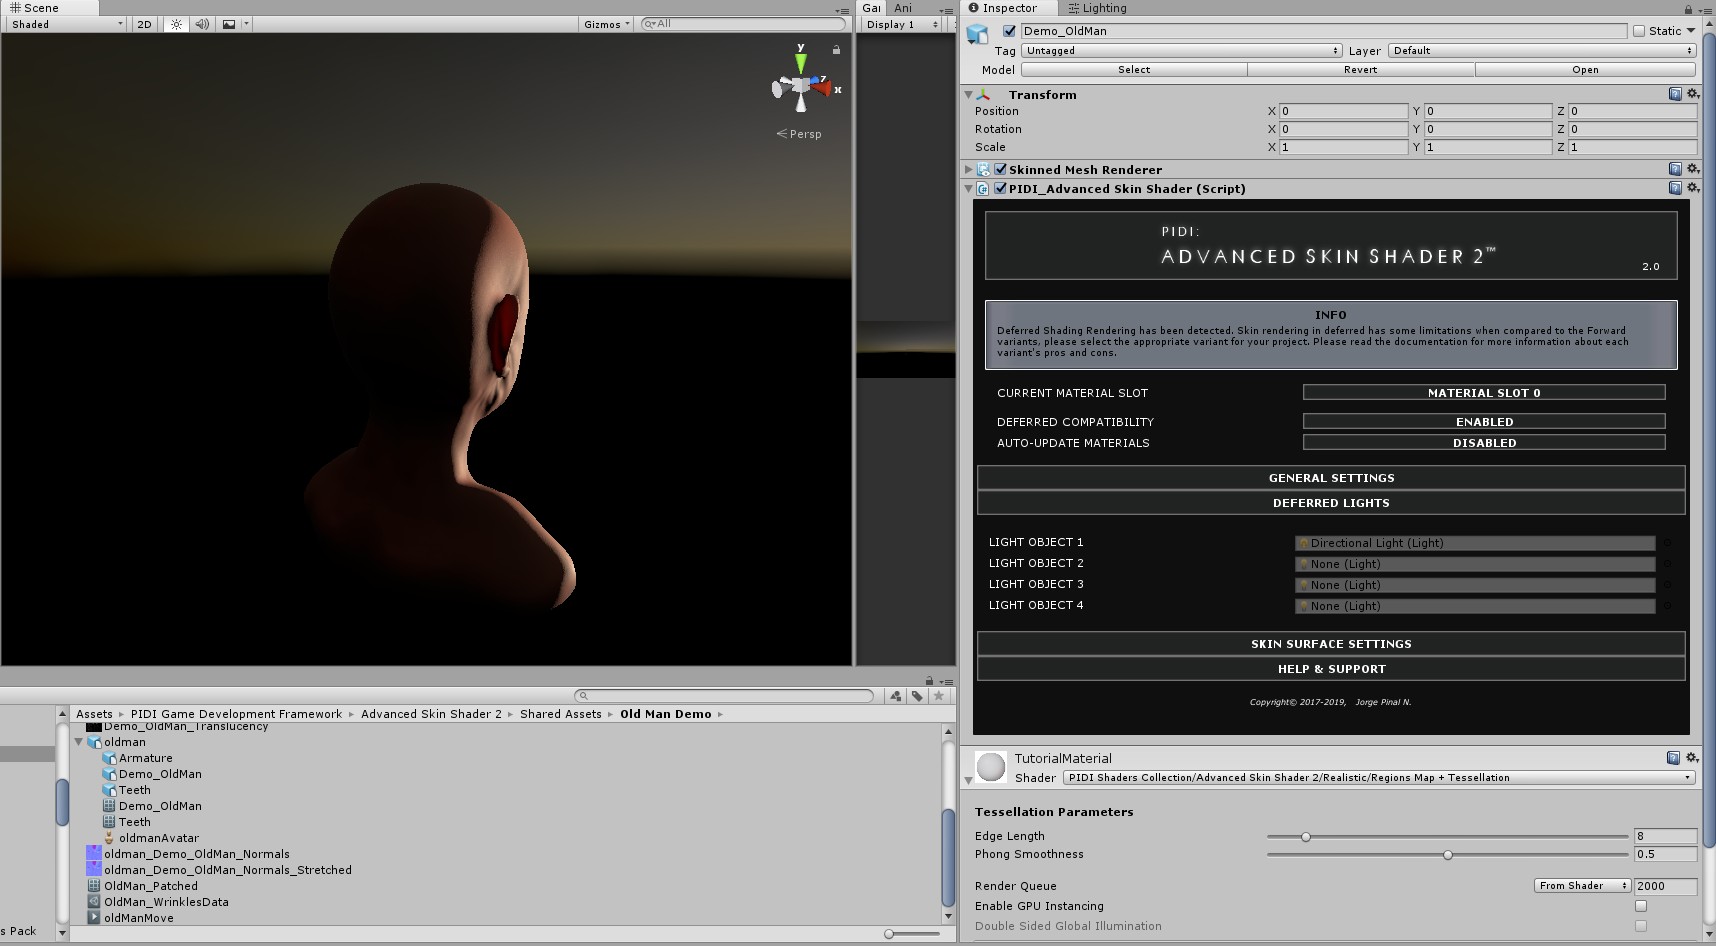
Create a new material and assign the Advanced Skin Shader/Realistic/Regions Map + Tessellation shader to it. Once this is done, drag and drop this material to the model. As you will be able to see, the material does not have any exposed property available, as all of them are managed internally by the AdvancedSkinShader script. Add this script to your model, next to the Skinned Mesh Renderer component now.
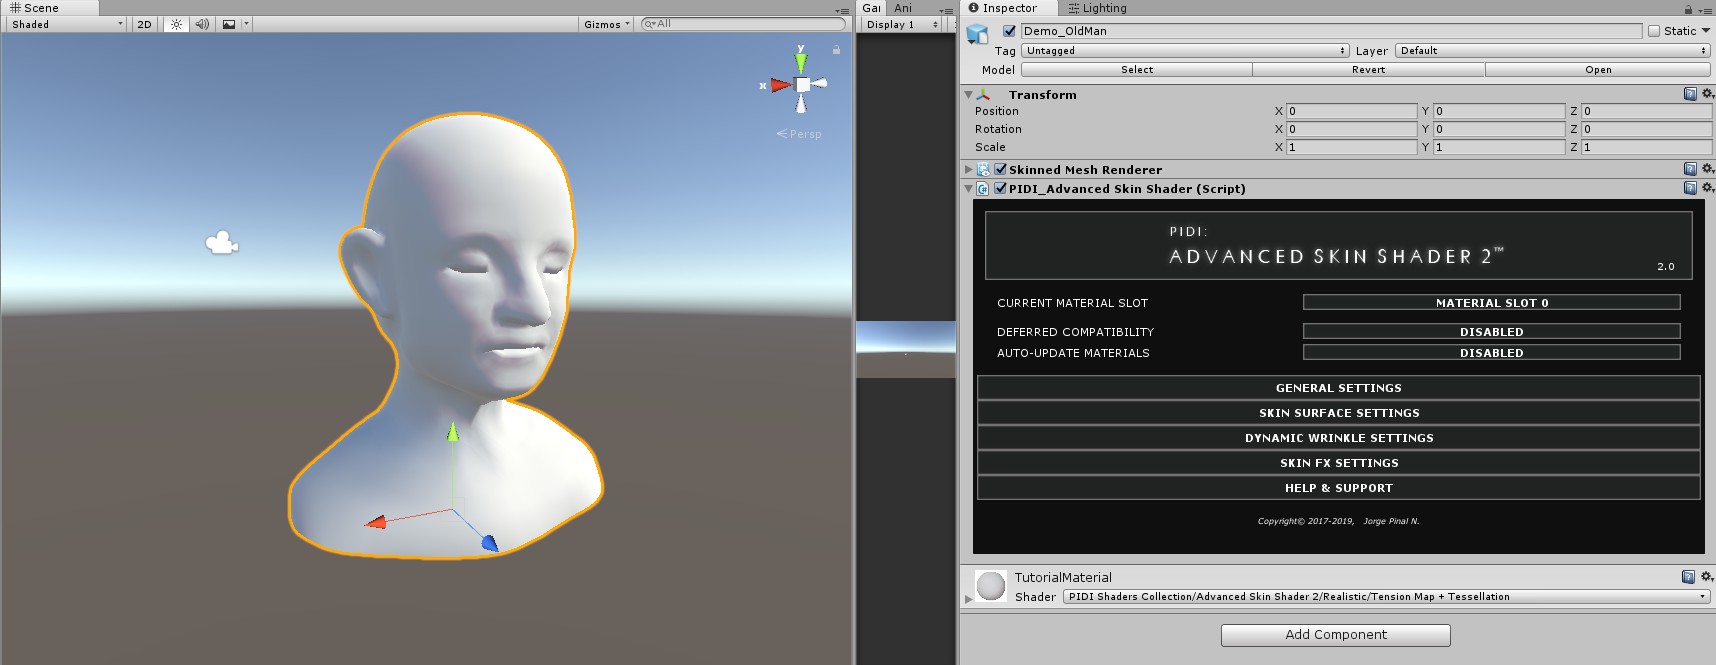
Open the SKIN SURFACE SETTINGS tab on the Advanced Skin Shader 2 UI. There, you can find settings for all the available properties of the material. They match standard PBR based properties, including a Main Texture, a normal map, specular / gloss map, an occlusion map and two additional textures, a translucency map and a micro skin details map (which is provided with the asset)

Assign each one of the corresponding textures to the different slots of the SKIN SURFACE SETTINGS Tab. Take into account that the glossiness factor is multiplied by the MicroSkin texture's blue channel, which will dim the gloss of the surface. The translucency map is a simple grayscale texture that contains a representation of the depth of the mesh and to define how much light should go through each section. The scattering color defines the color within the mesh, that will tint the light that goes through it.
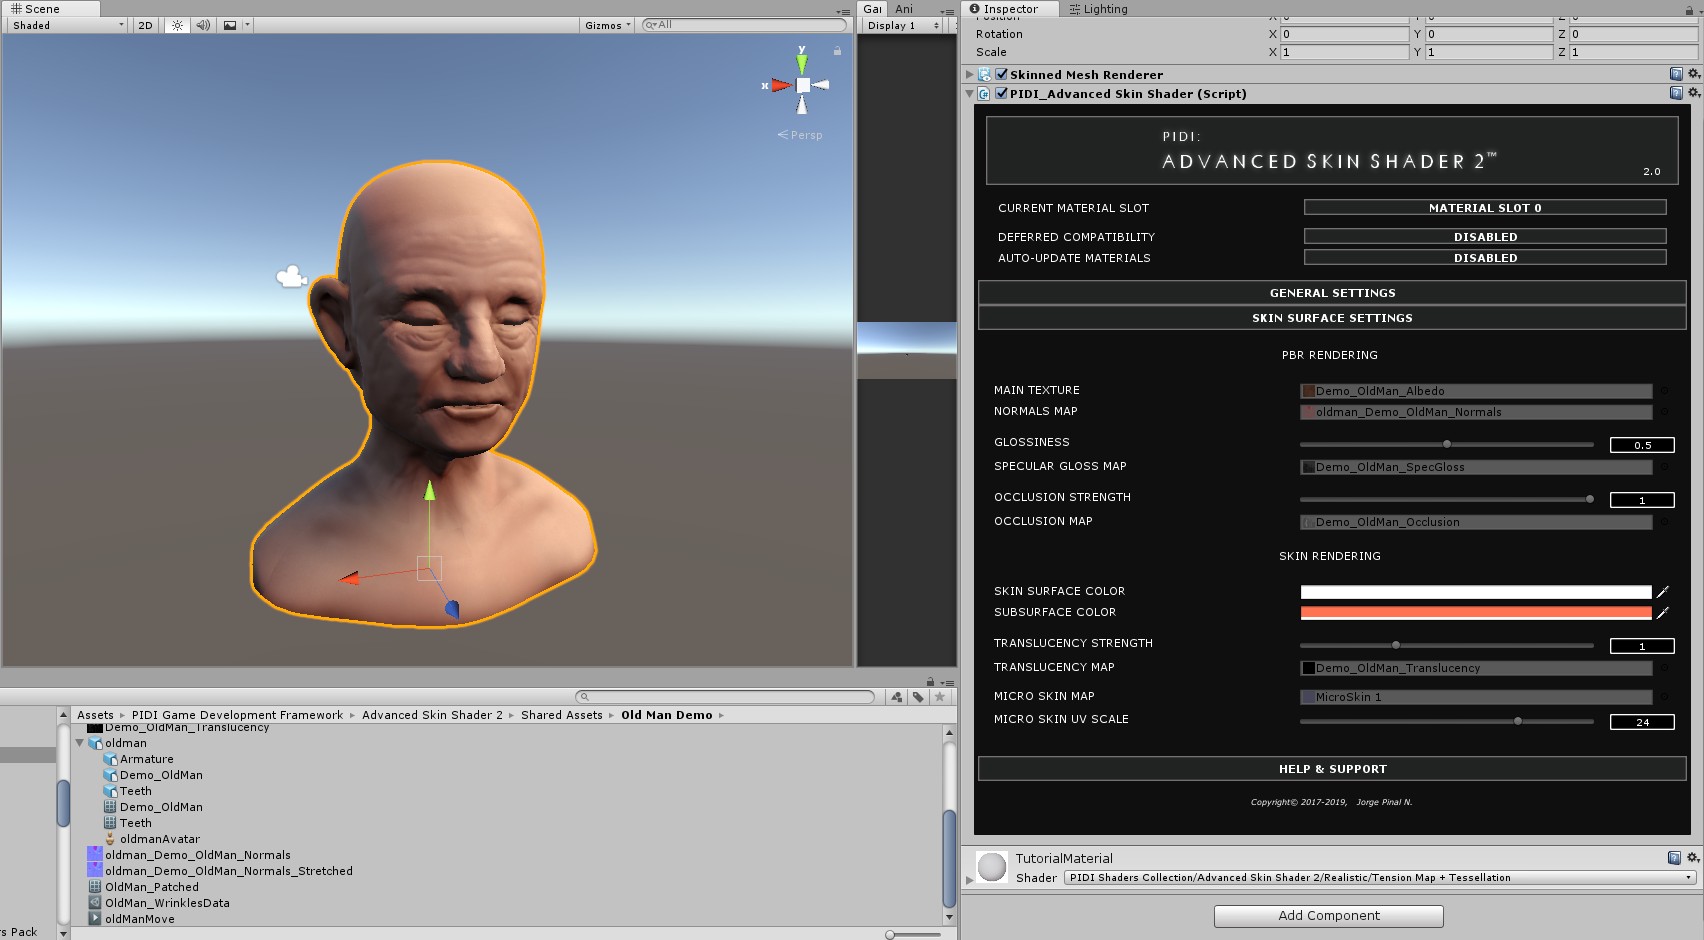
There is no additional setup required for the translucency and scattering to begin working in Forward, since the shader is designed to work out of the box in most cases.
In the next sections of this manual we will cover the different settings that must be configured in order to work with deferred shading and the Advanced Skin Shader, how to add dynamic wrinkles support to the characters as well as the advantages and disadvantages of each one of the two different methods provided for dynamic wrinkles. We will also cover the decals / overlays system, its limitations and capabilities, as well as how to use this shader within a workflow that depends on prefabs.
Advanced Set up Topics
Getting high quality results with PIDI : Advanced Skin Shader 2 is very easy and requires little set up, as we have seen. It can be done with any model, in a matter of minutes, and without needing any additional artistic knowledge. However, that is only the most basic setup that the asset offers and for users with a proper 3D art pipeline and more experience.
This section of the manual assumes that you have a more advanced knowledge about Unity and how it works, about 3D modelling and texture creation among other abilities. While it will not cover how to actually create 3D models or a step by step on how to generate the necessary maps for this asset it will give you instead the list of requirements that your 3D art and texture maps must meet in order to use the more advanced features.
Deferred Setup
Deferred shading in Unity is extremely useful since it allows you to render a huge amount of lights without additional passes on each object. However, to do this, all control over the lighting portion of a shader is removed and handled instead by the Deferred Shading shader. This makes it impossible to add new features such as scattering or translucency to any deferred shader without modifying or replacing entirely the internal Deferred Shading code used by Unity.
In order to avoid this and to make our Advanced Skin Shader work with any deferred shading system we decided to provide the missing lighting information manually. This allows the shader to work seamlessly with Deferred Shading while keeping the features mostly intact, but with the drawback of the scattering and translucency being limited to just four specific lights and the translucency itself not being affected by shadows.
These limitations, while small, still have to be considered. The shader does a good job at simulating the shadowing created by shadows over the translucency but this is not as accurate as real shadowing in Forward mode. The scattering is also highly accurate but its mixing with the rest of the lighting is not as soft and accurate as the one in Forward mode. Despite all this, for games using Deferred Shading mode, the Advanced Skin Shader still provides all the features and high quality with minimal setup being required.
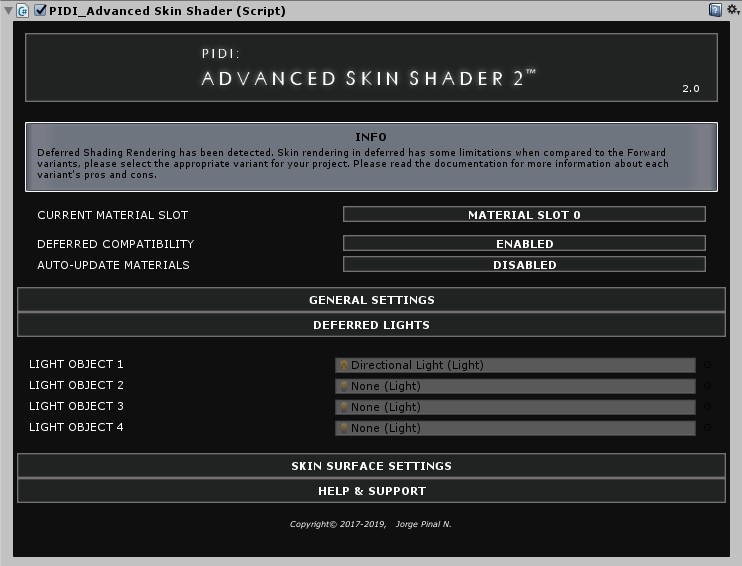
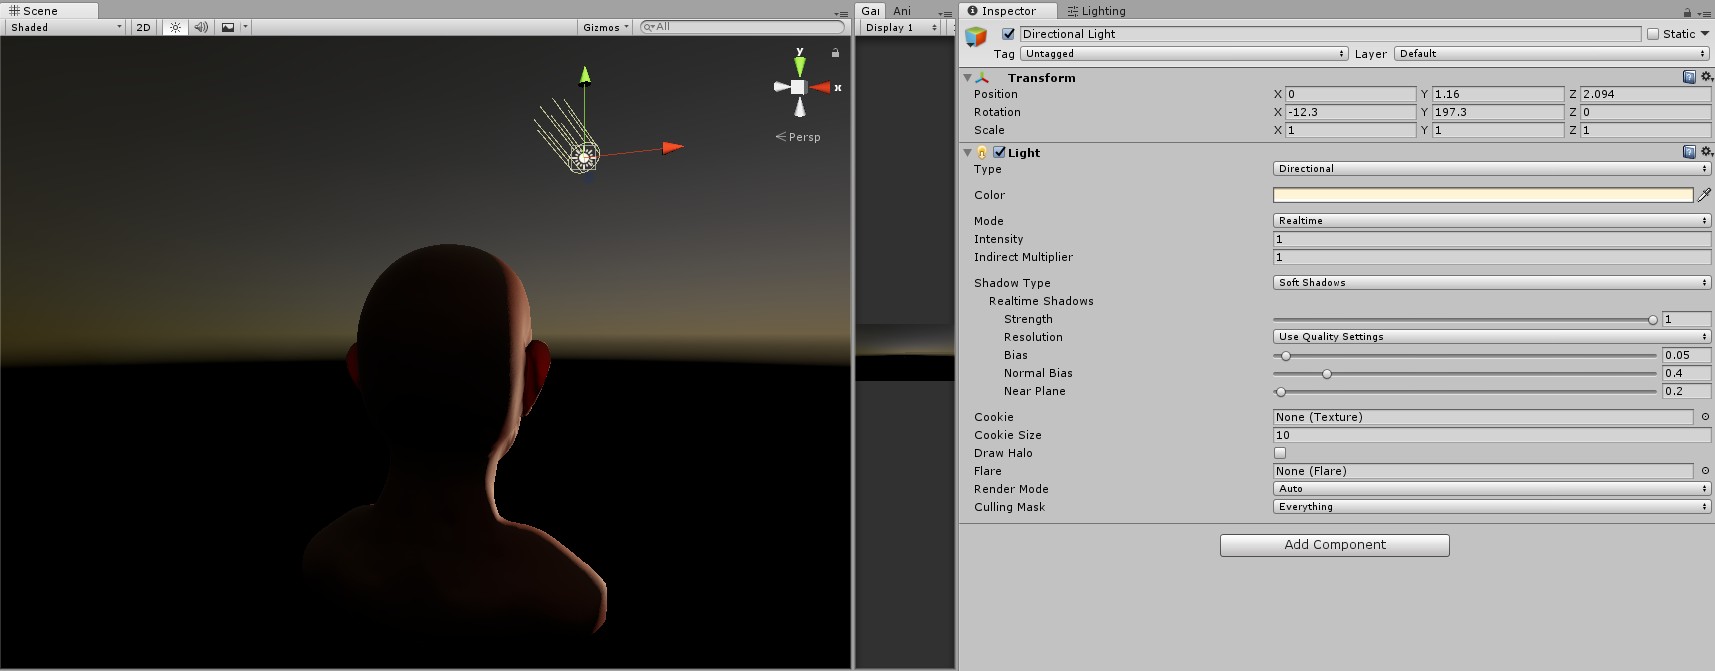
To start, set the DEFERRED COMPATIBILITY mode to Enabled. This will create an additional tab called DEFERRED LIGHTS, in which you can assign the four lights that will have effect over the scattering and translucency. Assign the lights that you want to affect the skin shader to that list. In our case, we will add the Directional light used in the previous scene to display translucency.
And as you can see, there is little to no difference between the quality of the end results once the deferred shading settings have been properly set up. Be aware that materials cannot be just switched between both renderings without any changes, since the final color and gloss may vary slightly between both rendering modes. Keep this in mind and remember to set up your materials accordingly.
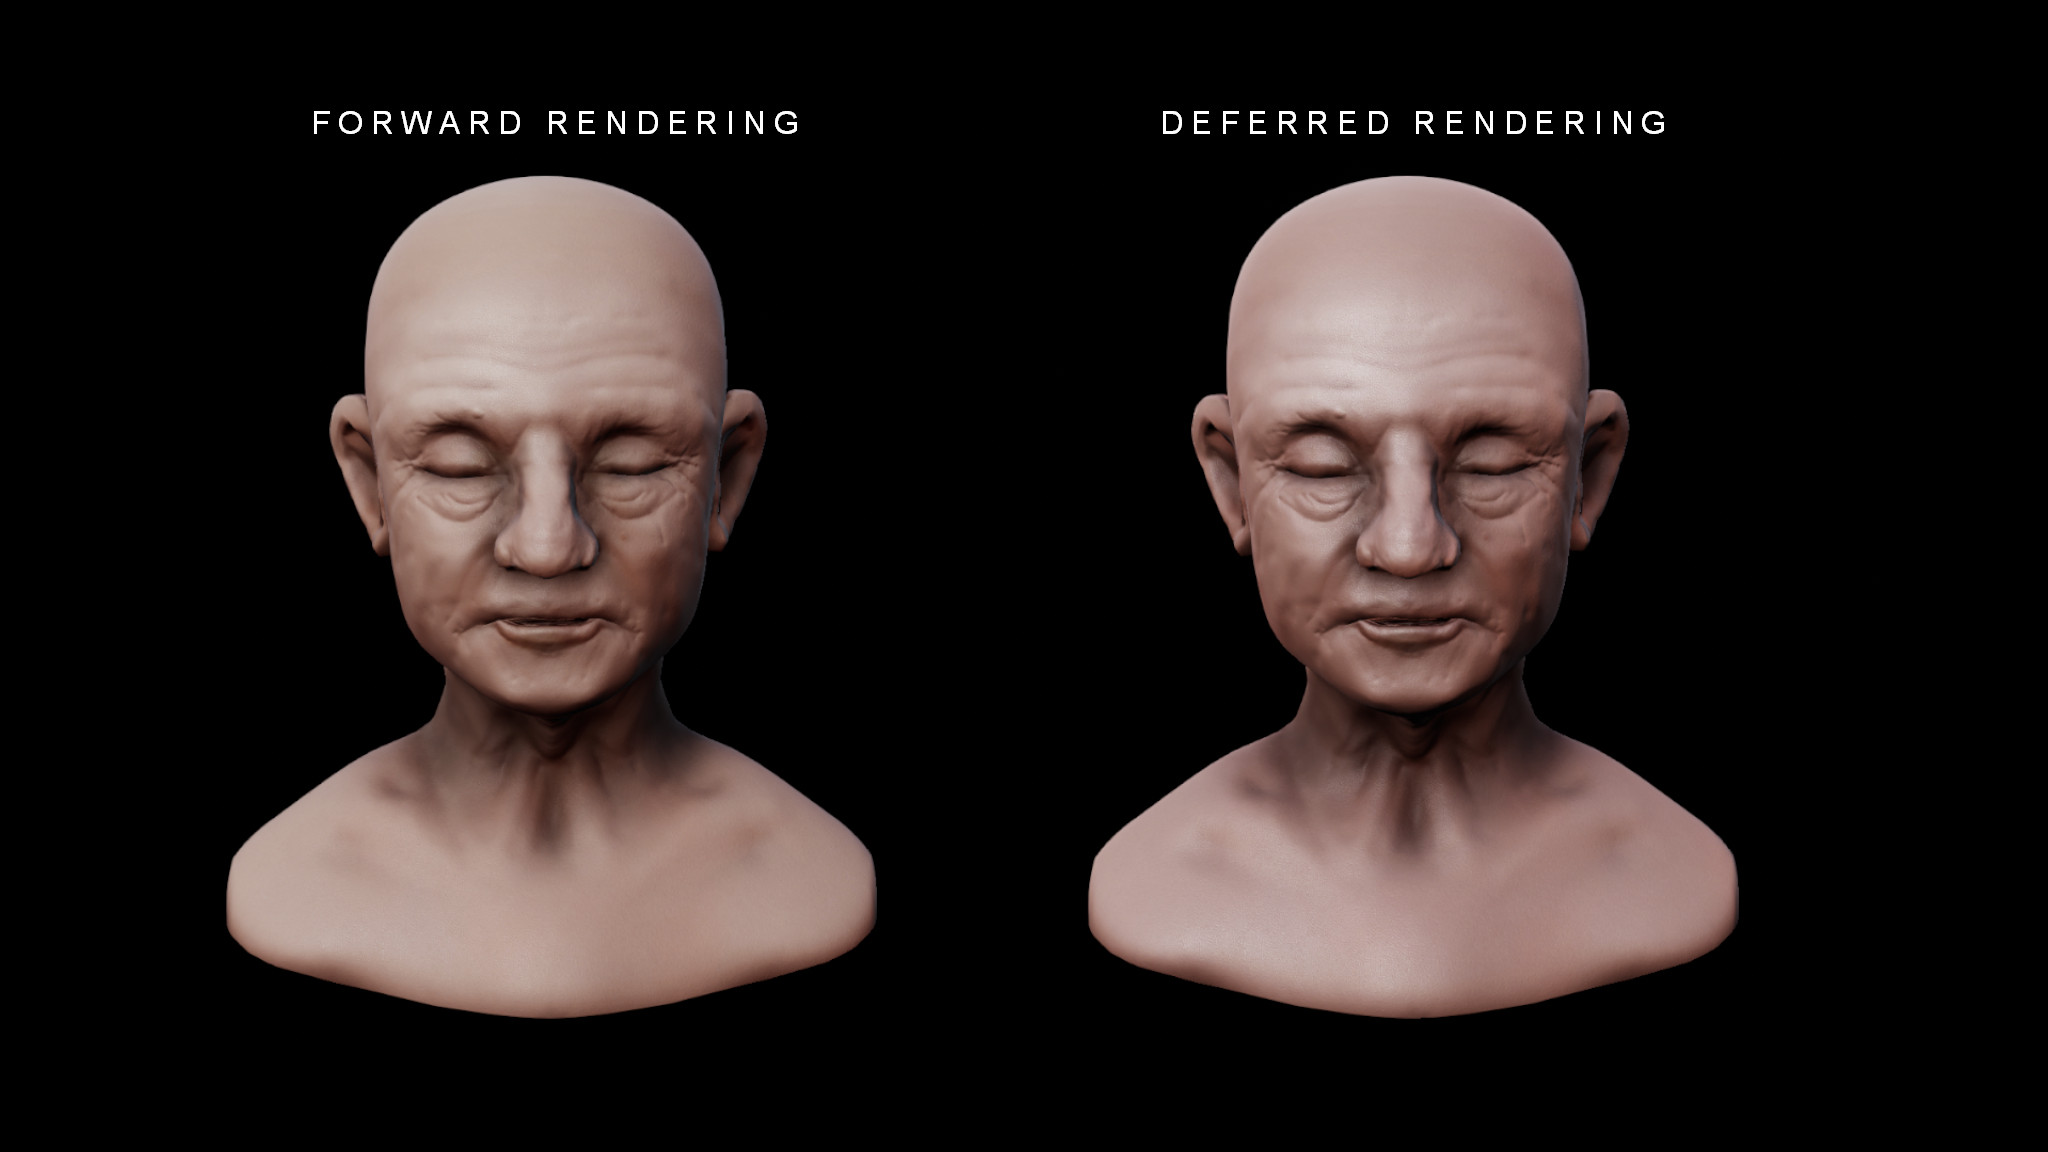
The gif below shows the shader working properly in deferred mode (as seen by setting the scene view to display the deferred normals of the scene) and with all features performing as expected, including the dynamic wrinkles through tension maps

Simple Shaders and third party tools (UMA example)
While PIDI Advanced Skin Shader 2 does not provide any pre-made integration with UMA nor any automatic setups for any third party tools, it includes a few shader variants that, while less feature rich than the main workflow for the tool, are extremely flexible and can be integrated into many third party pipelines.
In this case, we will use one of the variants appropriately called “UMA compatible” and some basic steps on how to use it with the popular free asset UMA 2
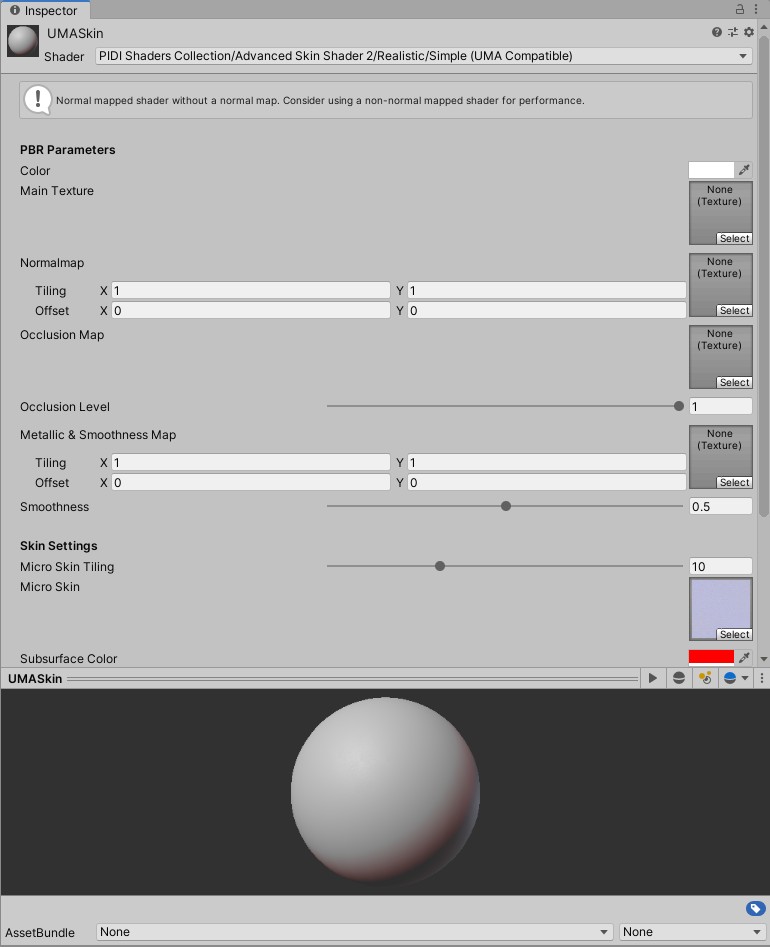
First, create a material using the PIDI Advanced Skin Shader 2 Simple (UMA), set its translucency level to 0 (since UMA does not generate translucency maps) and assign the Micro Skin texture to the corresponding slot in the material.
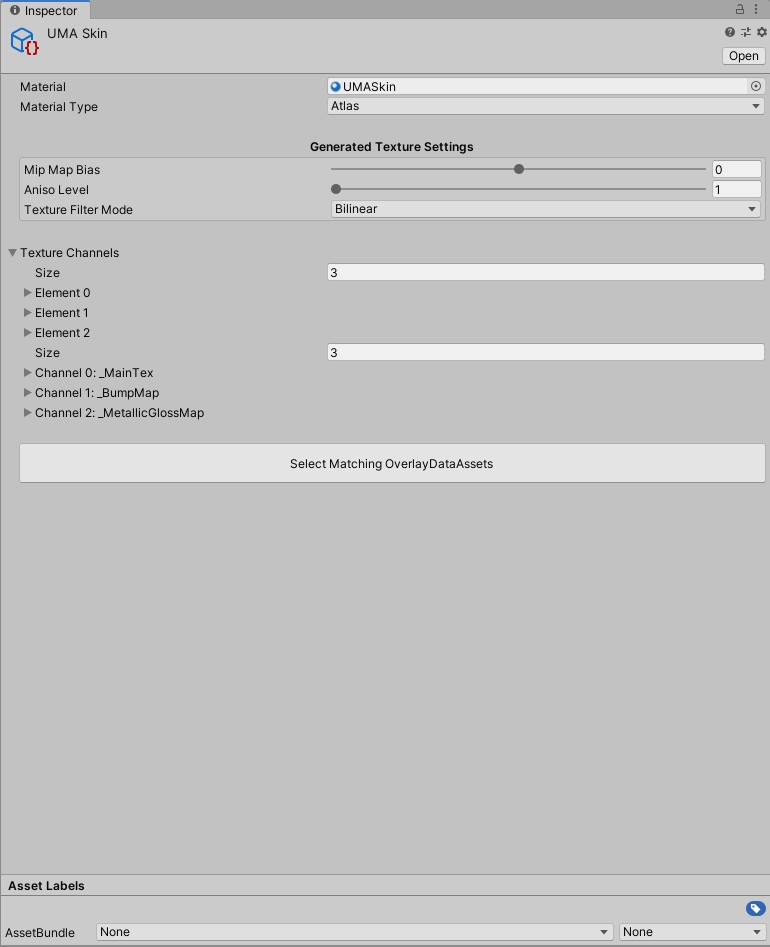
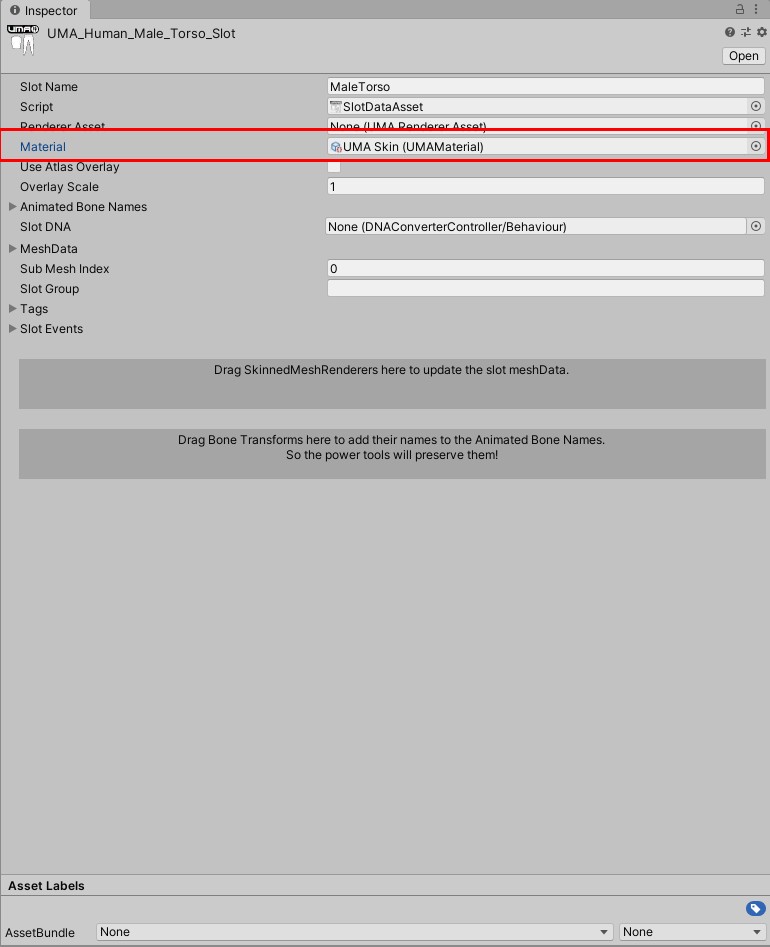
Then, create a UMA material asset. Assign the material we created in the previous step to the material slot of the UMA material. Set its 3 output channels as shown in the following screenshot. For reference, the settings are the same from the standard UMA_DiffuseNormalMetallic material.
Once the UMA material is created, assign it to all the corresponding slots in your avatar that you want to have skin rendering. Please follow the UMA documentation to know how to use custom UMA materials in your characters and how to assign them to slots successfully.
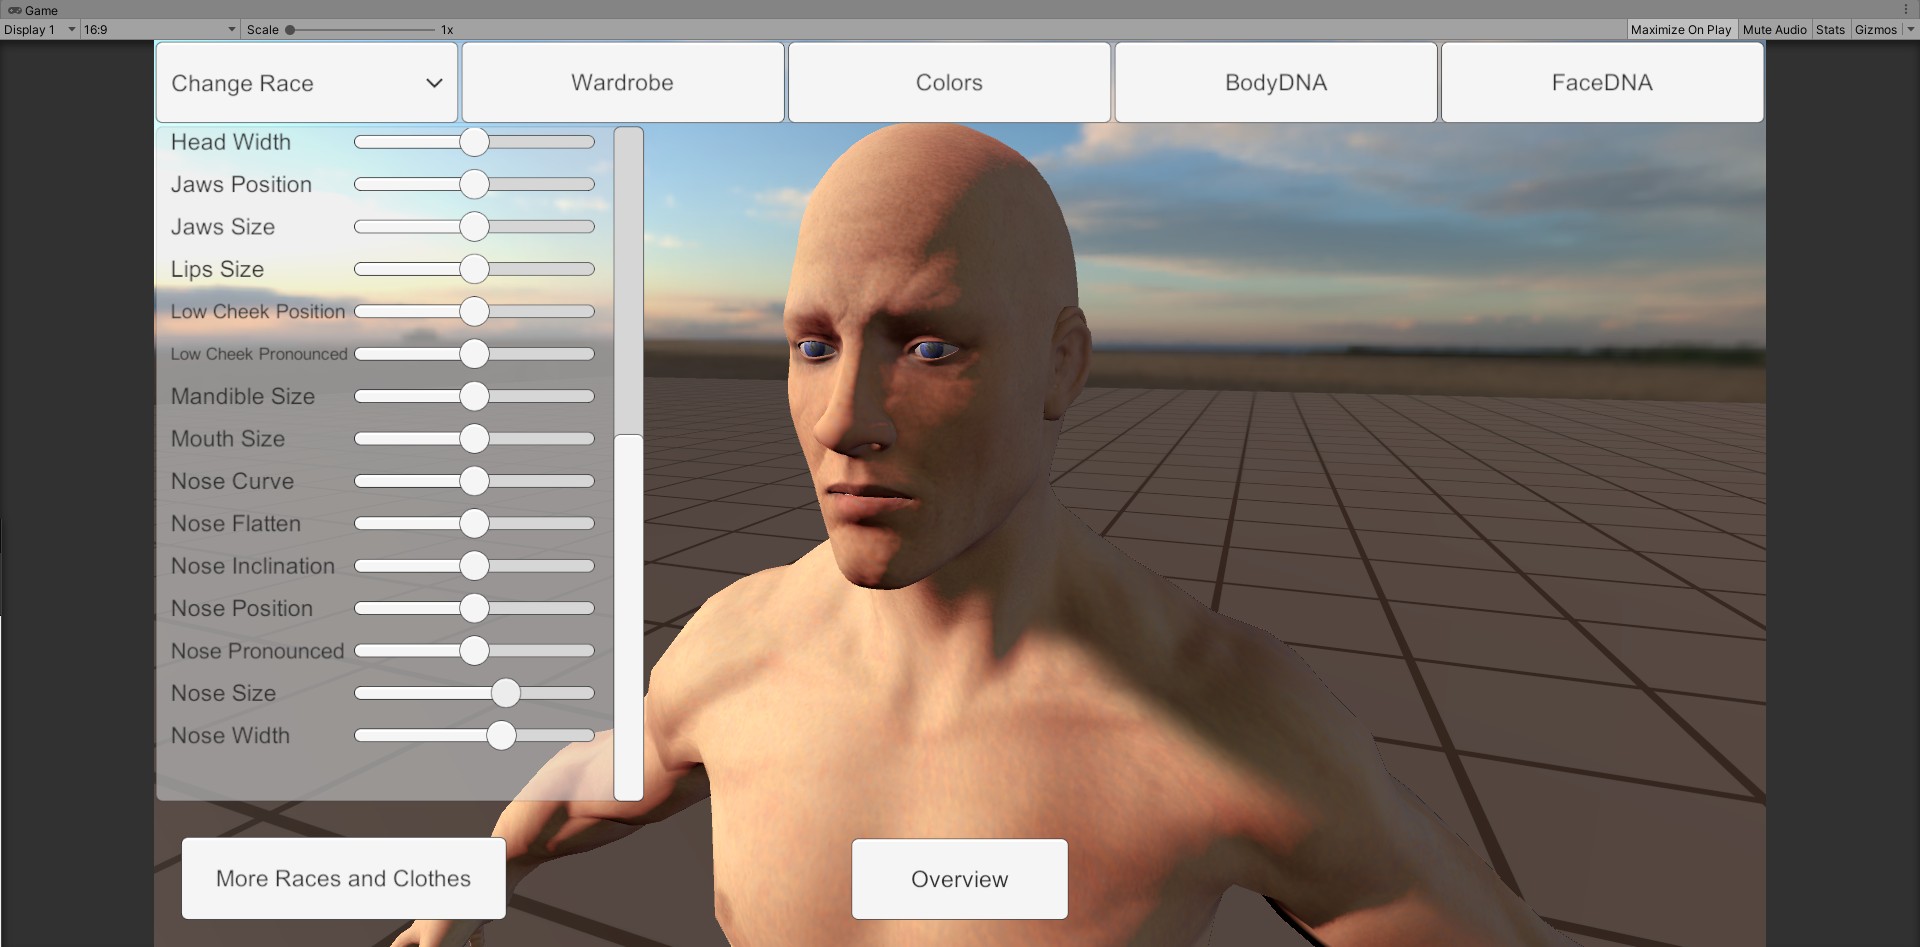
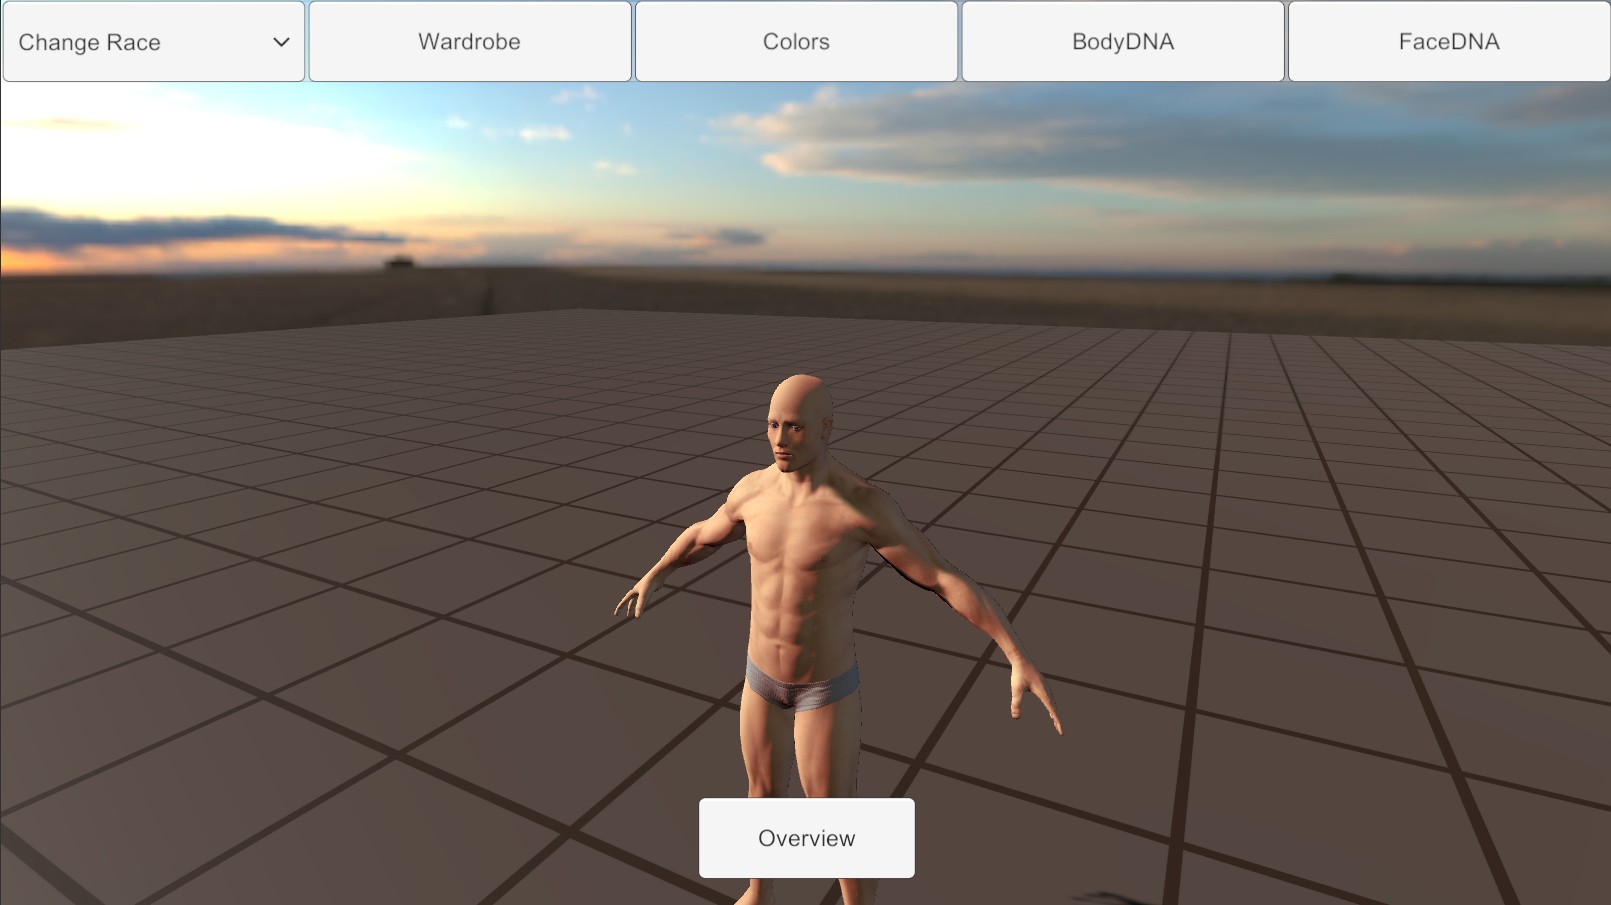
Once the integration is complete you will be able to see the skin shader applied to your characters and, depending on your own workflows, they may be even integrated within the character creator itself.
Please keep in mind the following limitations of the “Simple” and “Simple (UMA)” shaders compared to the rest of the materials provided with our asset :
- They are Forward compatible only
- They do not support any wrinkle maps nor (at the moment) our integrated decal/overlay/tattoos FX
- The UMA compatibility has only been tested in the Standard pipeline
However they are highly recommended not only for integrations with third party tools but also for characters that have multiple skin materials or for which the advanced features are not necessary since they offer a high quality rendering with a very flexible and easy to use workflow
Tension Map Wrinkles
The first method to add dynamic wrinkles to your models is the Tension map approach. Tension maps are run-time generated data sets that define which areas of a mesh are suffering deformation, and based on that deformation a transition between a “Resting” normal map and a “Wrinkled” normal map are evaluated and performed.
Our approach takes a “Resting” Normal map, a “Wrinkled” normal map and 3 different poses as references to compute and predict all possible wrinkled regions within the face of a character. While it provides with fast, high quality results that are computed entirely on the GPU and on any device and it is extremely easy to set up, it also has some inaccuracies that are unavoidable due to its results being predicted from a limited amount of data.
However, if the amount of normal maps you have is limited or you need high performance over multiple instances and a faster set up without perfect accuracy on every single pose being a huge concern, or if you need to deploy your project on lower end devices then the Tension Maps approach is the best method to use.
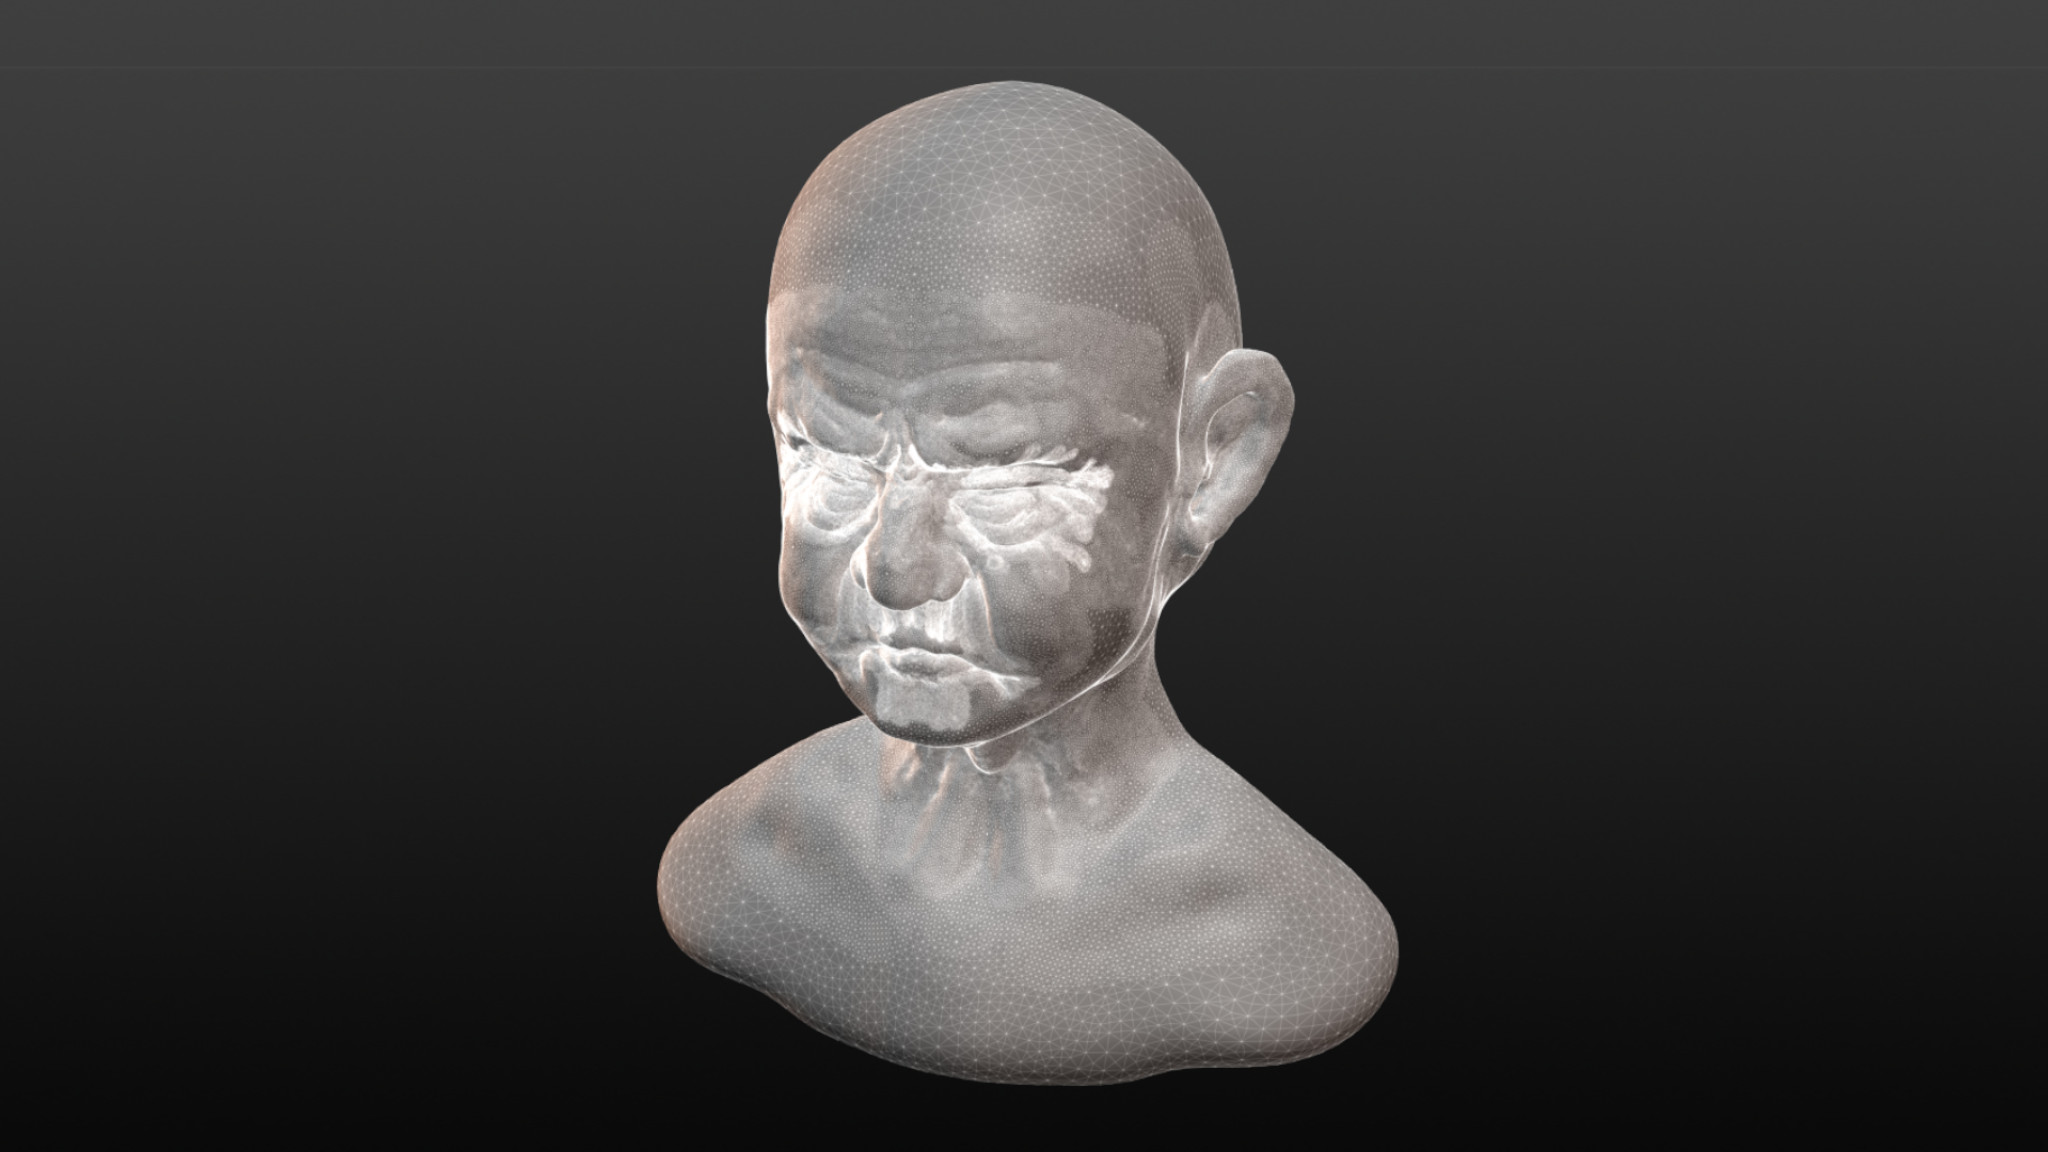
The three poses used as reference by the asset are the “Rest Pose”, a “Pulling Pose” (extreme surprise) and a “Pushing Pose” (extreme anger). This will ensure that the maximum deformations of the face are registered to calculate the transitions between its resting pose and these two extremes.
Using a high quality sculpt or 3D model of your character performing said expressions and displaying the correct wrinkles should be used to generate the normal map that will be assigned as the “Wrinkle” normal map. This process needs to be done carefully, to ensure that there are not too many different wrinkles overlapping each other and that they do cover most of the expressions that the character can make. Below you can find a screenshot of one of the sculpts used by our team when creating the wrinkles map for the Old Man model
Once you have generated the normal map for the wrinkles, we can start working on generating the tension maps in Unity. First, make sure that you are using a “Tension Map” enabled shaders. All the shaders that support Tension Maps contain “TensionMap” in their name. Then, enable the Dynamic Wrinkles feature on the General Settings tab of the Advanced Skin Shader UI.

Assign the Wrinkles normal map in the corresponding slot as well as the Head Bone of your character rig, and set the vertex threshold value to a higher value. This threshold defines how much the vertices have to move before they start being tracked for the Tension Map to be generated. If the value is too small then wrinkles may appear while the face is at rest and if it is too high they may not appear at all. Make sure that your mesh has a 1,1,1 scale and a 0,0,0 position and rotation before proceeding to the next steps.
Place the character in the rest facial pose, and then press the “SAVE REST POSE” button. This will create a snapshot of the rest pose and make the wrinkles from the wrinkle map disappear. Now, set the character in the first reference pose and press the “SAVE POSE ONE” button. Place the character on the second reference pose and press “SAVE POSE TWO”. Now your character is ready and set up to start using the Tension maps. You can see the dynamic Tension map working and changing by enabling the debug mode inside the Dynamic Wrinkles tab.
Notices about Prefabs
When using Dynamic Wrinkles with the Tension Maps method the original mesh of your character will be patched with additional information that will allow it to work in low end devices while keeping your original mesh intact. However, since this is a runtime procedural mesh it cannot be saved as part of a prefab, it has to be exported to the disk before being stored within a prefab object.
In order to do this, simply press the “SAVE PATCHED MESH” button and select a location within your project to store this mesh. Once this is done, this new mesh will be automatically assigned to your character model and the dynamic wrinkles will keep working as intended and, since the generated and patched mesh has been saved to the disk, you can now create your prefabs as usual.
Region Map Wrinkles
The second method included with this tool to add dynamic wrinkles to your characters is called Region Maps approach. With this setup, instead of having a “Rest Pose” normal map and a “Wrinkles” normal map you can have any number of expression poses each one with its own unique wrinkles map, allowing higher quality results. While setting it up is a more involved task that has many more steps than the Tension Maps approach the results you can get with it are far more consistent, easier to customize and control, and allow for a much higher quality at the cost of a higher performance impact.
However, when dynamic wrinkles are disabled these shaders are far more efficient than their tension map counterparts so it is always recommended that if you are not going to use Dynamic Wrinkles at all you assign a Regions Map shader to your characters, even in Mobile.

Let's add regions map wrinkles to our model, but first we will need to create a Wrinkles Data Asset which will act as a list containing all of the Wrinkle Normal maps available for this character.
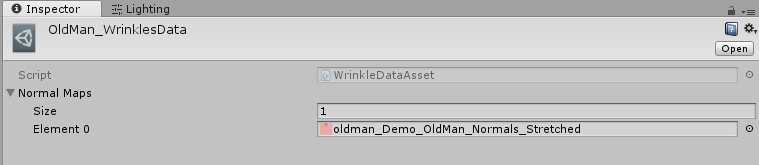
And on this asset, let's add all the normal maps we have generated for this model to the corresponding list. The Wrinkle Data Asset is designed to help you organize your maps, especially in projects where there are dozens of normal maps per character. On top of this, as more updates are released for this tool the Wrinkle Data Asset will gain additional features and settings that will allow you to have further control over the wrinkles on your character in an easy, reusable “template-like” fashion. In our case, we only have one wrinkle normal map on this character.
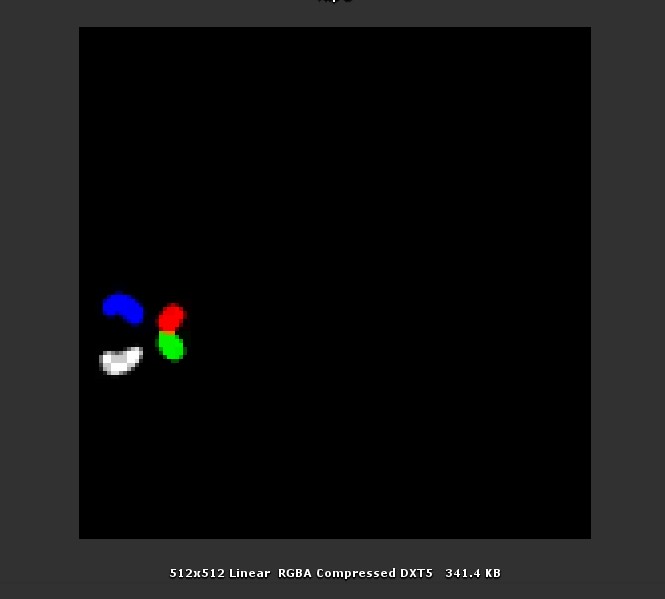
Next, we need to create a regions map. A regions map defines how the different normal maps, the one from the rest pose and those from the different wrinkle maps will be blended in up to four different zones (channels R, G, B and A). Each channel represents an area of the face and each one of them will be multiplied by unique per-pose blending values. You can have one general regions map to be shared across all expression poses or override it with a unique regions map on any of the individual poses.
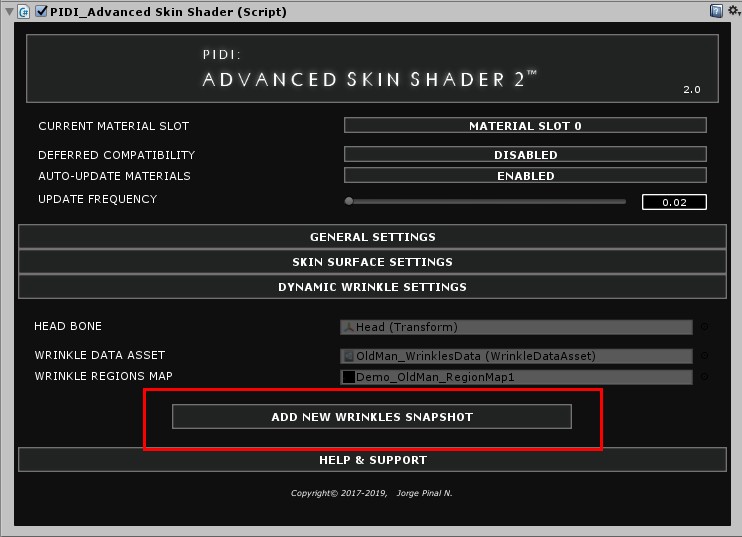
Once this is ready, assign the Wrinkle Data Asset, Head Bone and Regions Map to their corresponding slots. Then, press on the “ADD NEW WRINKLES SNAPSHOT” button
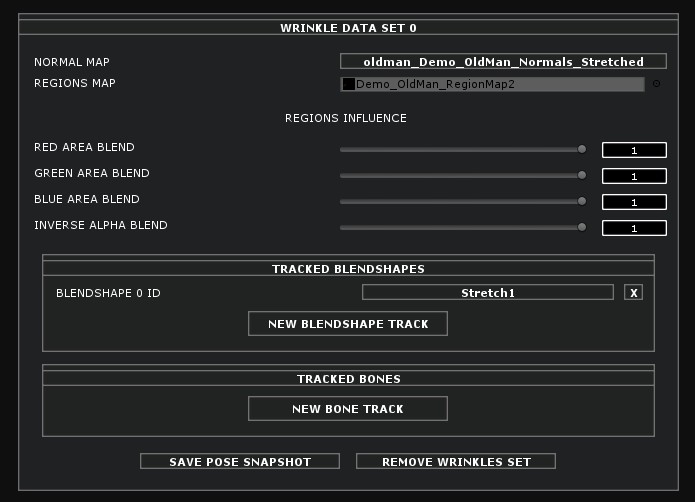
This will add a new sub-group called WRINKLE DATA SET followed by a number. This data set represents a pose or expression that your character can make and contains the information of which bones or blendshapes are used for said expression and thus should be tracked, which normal map corresponds to said expression, which region map to use to control its influence in case we want to override the default one, the influence of each one of the four regions in the region map (RED, GREEN, BLUE and an inverse ALPHA channel) and finally the blendshapes and bones that have to be tracked to detect whether the character is performing the expression described in the snapshot or not
You DO NOT need to define a snapshot for the rest pose, this is generated automatically and stored internally. Once you have added all the blendshapes and bones that you want to track to the lists you just need to place your character in the pose you want to save and click on the SAVE POSE SNAPSHOT button.
In the Tension Map vs Region Map demo scene included with the asset you can see a fully set up example of the Regions Map usage with the Old Man Demo. One wrinkle snapshot has been created for each one of the five different blendshapes that the model has. In all of them the same normal map has been used but some of the expressions make use of a different region map that instead of defining regions for the sides of the mouth and both sides of the brow cover instead the brow and the forehead.
In the CGI Stylized demo you can see another usage of this technique, this time in a character whose animation is fully driven by bone animation and which uses two different wrinkle maps and two region maps for the small expressions set
While the regions map approach works on mobile devices as well as in most devices that support RenderTextures (which are used internally to generate additional wrinkle data) they are CPU bound and thus may not be the most performant in low end devices. For a full breakdown of the pros and cons of each method please check the table below.
Tension Maps vs Region Maps comparison
| Feature | Tension Maps | Region Maps |
|---|---|---|
| Main wrinkle calculation processor | GPU | CPU |
| Mobile Ready | ✓ | ✓ |
| SRP Ready | ✓ | ✓ |
| Supports Decals on Mobile | X | ✓ |
| Max. Reference poses | 3 | 32+ |
| Max. Wrinkle Normal maps | 1 | 32+ |
| Wrinkle Occlusion maps | With Occlusion Map's Alpha | X |
| Per Pose Wrinkle Weights | Automatic, variable | Manual, 4 weights per pose |
| Per Pose Performance Cost | Stable Performance | Additive |
| Main advantage | Simplicity & performance | High quality & full control |
| Main disadvantage | Automated, may be imprecise | Complex setup, lower performance |
Texture Overlay FX
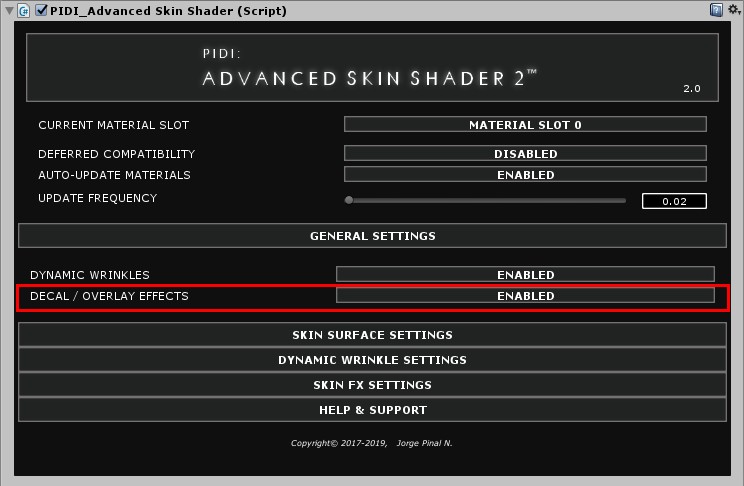
Adding overlay or simple decal textures to the skin shaders is very easy. Simply go to the GENERAL SETTINGS tab and set the Decal / Overlay Effects setting to true. This will add a new tab called SKIN FX SETTINGS.
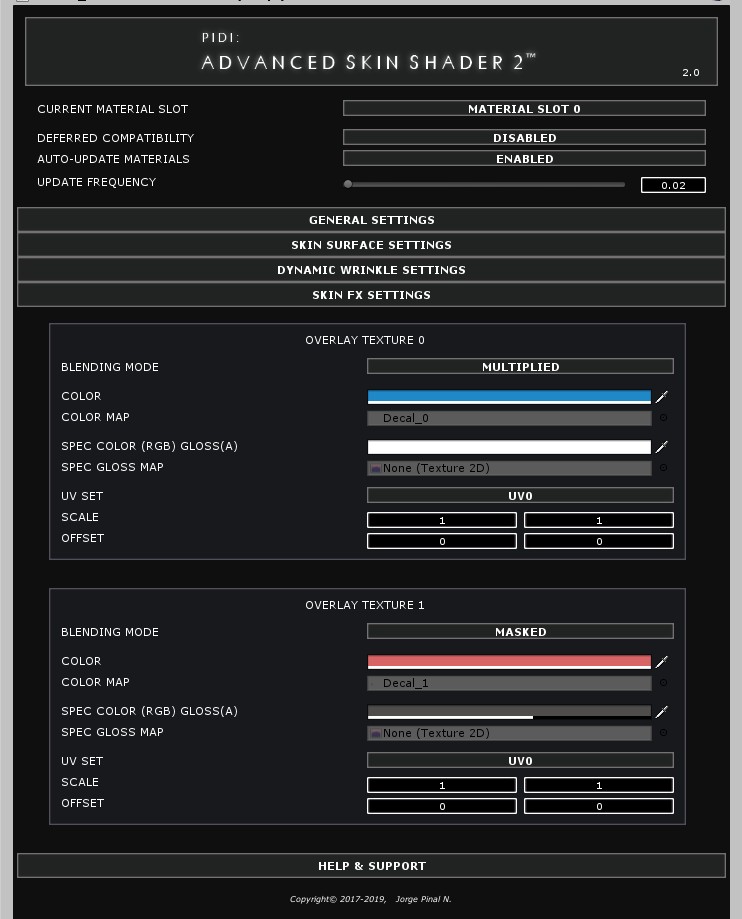
In this tab, you can assign up to two different color maps to be used as overlays each one to be mixed in their own unique way with three blending modes : Masked, Additive and Multiplied. Each one of these two decals can have their own color, specularity / gloss maps and be displayed either on the UV0 or UV1 coordinates channel.

These decals allow you to easily and efficiently add effects such as sweat, wounds, tattoos, war paint etc to your characters while having full control over how it mixes with the skin under them and all their PBR properties. They are influenced by scattering, translucency and wrinkles as the rest of the skin and are available in all platforms.