Table of Contents
PIDI Planar Reflections 3
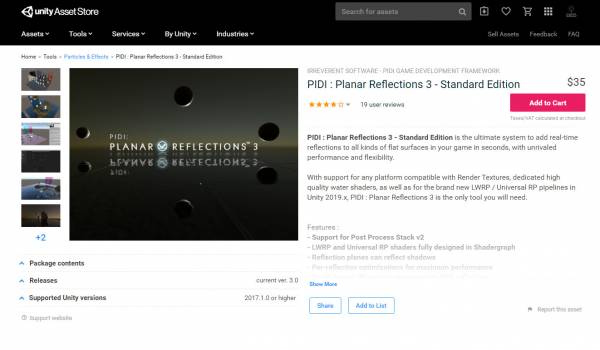
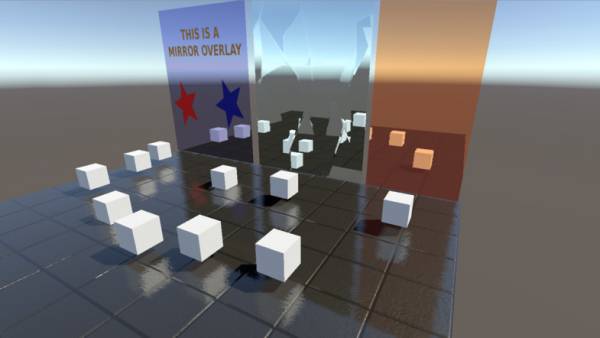
PIDI Planar Reflections 3 is an advanced tool to add real-time reflections to your 3D scenes easily and with a low performance impact. The tool comes with dozens of custom shaders that allow you to create all kinds of reflective surfaces from simple mirrors and basic opaque surfaces to complex PBR materials, water and glass floors and walls.
Furthermore, the asset comes with specific shaders and workflows for mobile devices and for the Universal RP / High Definition RP in Unity 2019.4+
In this documentation you will find a general description of all the different features of this asset, a small setup guide and some performance tips to help you add reflections to your scenes in no time.
PIDI Planar Reflections 3, Standard vs Lite Edition
PIDI Planar Reflections 3 is available in three different editions which may adapt to all kinds of teams and budgets. A Lite edition with only the essential features is offered at a much lower price while the fully featured Standard / Team edition is targeted to projects and developers that may need more advanced features out of the reflections system.
Below you can see a comparison table showing the full feature set of each edition. The Lite edition has an add-on sold separately which adds LWRP support in Unity 2019.4+ (this add-on is included free of charge in the Standard / Team edition). To learn more about the specific limits and differences between the standard Unity rendering pipeline (also known as Built-in) and the new LWRP pipeline, please go to the corresponding section of the documentation.
| Feature | Lite Edition | Standard Edition |
|---|---|---|
| Source code access | ✓ | ✓ |
| Post Process Stack v2 support | X | ✓ |
| Reflection's depth pass | X | ✓ |
| Dynamic resolution / manual downscale | ✓ | ✓ |
| Culling, clipping and shadows control | ✓ | ✓ |
| Static + real-time reflections composition | X | ✓ |
| Opaque PRB Shaders | ✓ | ✓ |
| Transparent PBR Shaders | ✓ | ✓ |
| Mobile-ready shaders | ✓ | ✓ |
| Universal RP (URP) support | With SRP add-on | ✓ |
| Support for integrated URP Post FX | X | ✓ |
| HDRP support | X | ✓ |
| Support for integrated HDRP Post FX | X | ✓ |
| Water shaders | With Water add-on | ✓ |
| Blur Pass | X | ✓ |
Both Lite and Standard / Team editions grant you access to our support services (via email and the Unity forums) as well as to free updates for this tool during the whole 3.x cycle which covers versions 3.0 through 3.9 of PIDI Planar Reflections 3
*The LWRP pipeline has been deprecated by Unity and thus is no longer supported. Please use the Universal Rendering Pipeline integration instead. For better compatibility, use the latest versions of Universal RP / HDRP with Unity 2019.4 or above.
Universal / High Definition RP vs Standard Pipeline
The Unversal SRP and HDRP are new rendering pipelines introduced by Unity. They have been marked as stable in Unity 2019.3 but still receives frequent updates, feature changes, bug fixes etc.
Because of its “in-development” nature, compatibility-breaking bugs and serious performance issues can be expected while using this tool alongside Scriptable Rendering Pipelines, which will be solved as the rendering pipeline itself becomes more stable and usable.
Due to the many limitations in SRP rendering including the inability to render cameras manually, render with custom shaders/effects, the limited access to the rendering process on a per-camera basis and many others, reflections in Universal RP are limited.
| Feature | Universal / High Definition RP | Standard Rendering |
|---|---|---|
| Render to external RenderTexture | ✓ | ✓ |
| Post Process Stack v2 Support | ✓ | ✓ |
| Real-time + Static Reflections | X | ✓ |
| Dynamic reflection resolution | ✓ | ✓ |
| Advanced optimization | ✓ | ✓ |
| Layer-specific reflections | ✓ | ✓ |
| Water shaders | Universal RP Only | ✓ |
| Depth based effects | X | ✓ |
| Blur Pass / Blurred reflections | ✓ | ✓ |
Due to multiple changes in the way URP / HDRP releases are handled by Unity it is heavily recommended to use the latest LTS Unity release for SRP pipeline development. The SRP packages provided with the asset are clearly labeled to indicate which SRP and Unity version they are targeted for. While they may work with newer versions of Unity and Universal RP / HDRP it is recommended to use their targeted versions.
Quick Setup Guide
In this quick guide we will go through the whole process of using PIDI Planar Reflections 3, from installing the software into your project to adding it to a scene.
As a first step, please ensure that your project fully meets the requirements below :
- It is being developed with Unity 2017.1+
- If it uses Universal RP or HDRP, make sure you are using the latest Unity LTS release (Unity 2019.4 LTS)
Installation
While PIDI : Planar Reflections 3 has been designed to be integrated to any project at any stage of development with little to no setup required, there are still some considerations to be made for projects which are upgrading from the original release (version 2.0 - 2.9 ) or projects using the new Scriptable Rendering Pipelines (URP / HDRP). Below you will find the steps to follow in order to install and setup PIDI : Planar Reflections 3 in any of these cases.
Standard Pipeline Projects
For projects working with the Standard Pipeline there is little to no setup required. If this is a first time installation you just need to head to the Asset Store and find this asset either under the section “My Assets” or by a normal search in the store itself.
If you have bought the asset, a Download / Import / Update button will show, depending on if you have never downloaded the asset before, you have downloaded it and it is in cache already or there is a new version available for download, respectively.
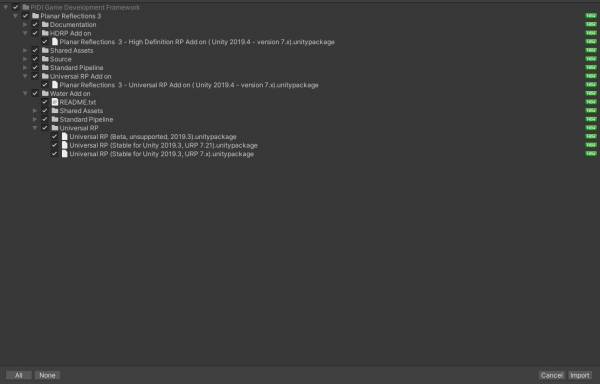
Once the import dialog appears, just import all the contents of the asset as usual. To verify that the asset was imported without any errors try to open one of the demo scenes. If they work without issues, the package has been imported correctly. If you see any graphical errors you must re-import the asset. If the issues persist even with a brand new and empty project, please contact us at our support email
URP Projects (also applies to HDRP)
In the last step described above, once you see the import dialog while adding this asset to your project, DO NOT import the Standard Pipeline folder to your project. Importing this folder would cause errors due to the shaders and materials included in it being incompatible with URP.
Instead, once the tool has been fully imported, unpack the HDRP or Universal RP package that better matches your Unity and SRP version. If you plan to use the water shaders for URP make sure to also import the corresponding URP shaders from the LWRP Add on folder as they include several sub graphs and assets required by the water shaders.
To achieve the best results and especially if you plan to use the advanced Water Shaders with URP, you must change the settings of the Scriptable Render Pipeline Asset that you are using (you can find it in Project Settings / Graphics) and enable the Opaque and Depth texture rendering features. This will ensure that all the internal data required by PIDI Planar Reflections 3 is generated.
While we do our best to keep up to date with LWRP releases there may be times when Unity updates their pipelines and adds or removes functionality from them (and in most cases breaking the compatibility of LWRP shaders) before we can issue the corresponding update. If your version of Universal RP / HDRP does not load the shaders appropriately or the demo scenes inside the URP Add on folder show pink materials please be patient, as we will issue the corresponding patch usually within 1-2 days of a new LWRP release or contact us to let us know the details of the error to our support email.
Warning : Please remember to make a backup of your project before upgrading or installing any tool or asset. While we do our best to ensure that our software is free of errors and easy to use, we are not responsible for any loss of data, corrupted files or projects produced during the installation or use of this software.
Once the asset has been successfully installed into your project, adding reflections to an existing scene is a simple process that can be done in just a few minutes. For more advanced uses and in-depth information about each feature please continue reading this documentation.
Adding Reflections to a Scene
The way reflections are handled in PIDI : Planar Reflections 3 is very different from the workflow used in earlier versions, having been redesigned to make it both easier to use with more predictable results as well as more optimized, allowing the user to easily add reflections to multiple surfaces across entire levels.
PIDI : Planar Reflections 3 works based around the concept of Renderers and Casters. Renderers are especial objects that are invisible to the in-game cameras and whose only purpose is to calculate and render high quality planar reflections that are fully configurable. These Renderers output a RenderTexture that can then be read by a Caster which will then project it into any material assigned to either a Mesh or Skinned Mesh Renderer.
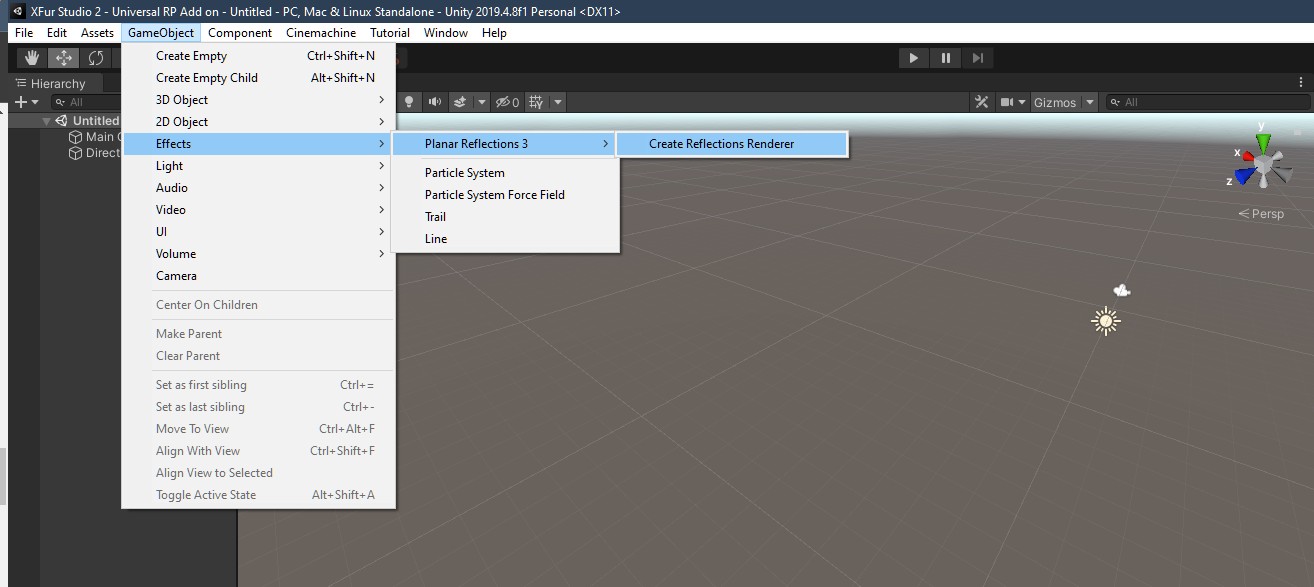
To add a Reflections Renderer to a scene, go to the GameObject menu on the top bar, then to the Effects submenu and inside it to the Planar Reflections 3 / Create Reflections Renderer
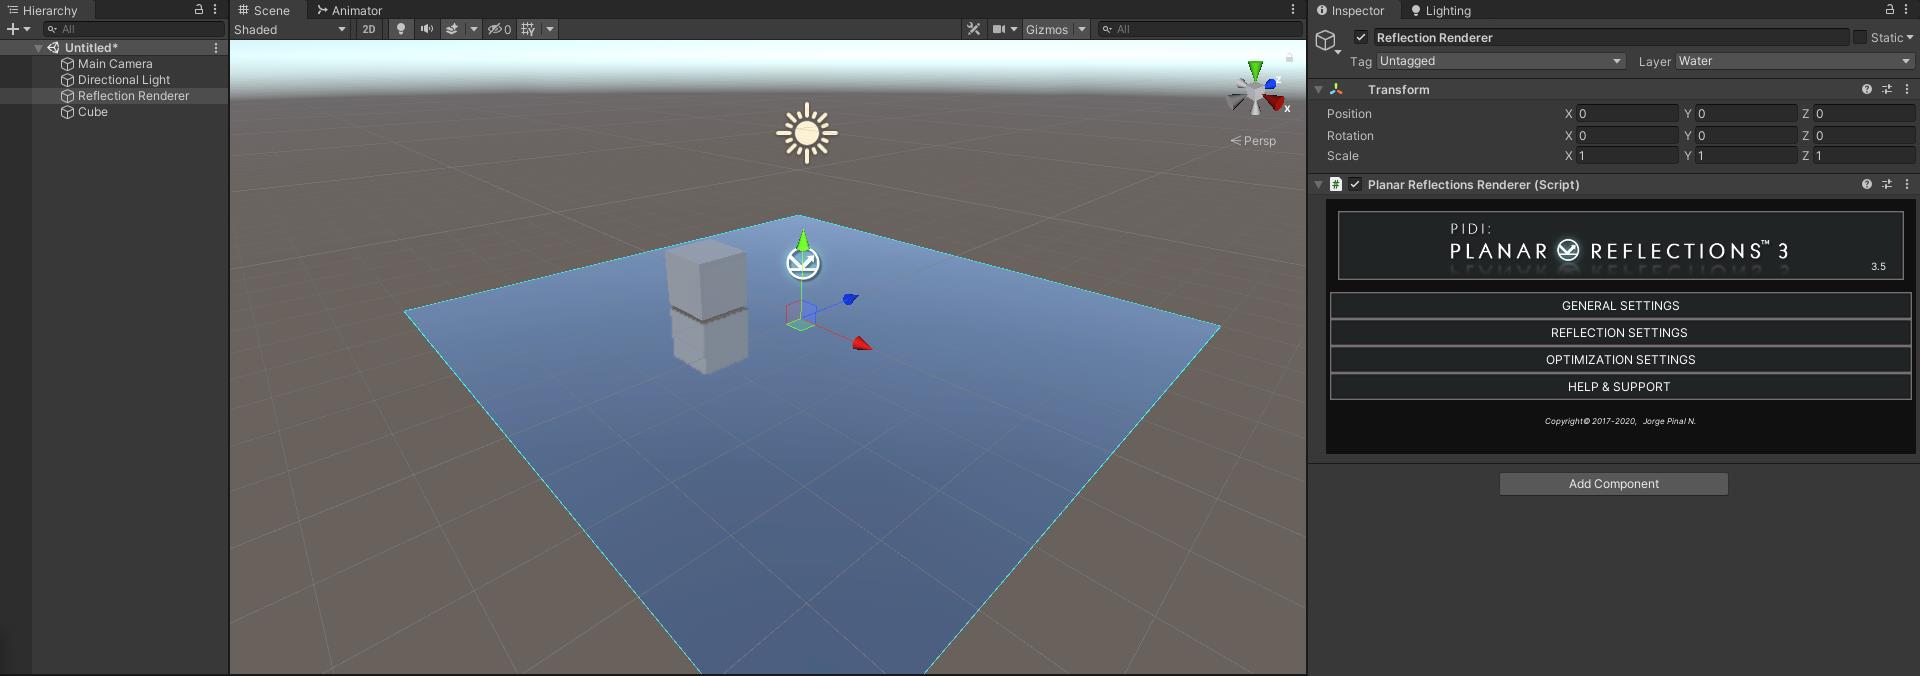
Once you do this, a new object will appear in the middle of your scene with a basic configuration, rendering accurate real-time reflections of every layer. This reflection renderer is already adjusted to simulate a reflective floor, with an optimized 50% downscale resolution and set up to the appropriate Water layer.
As you will notice, this reflection renderer is not visible in the Game view, only in the Scene View. In order for the reflections to be visible in the Game View we will need to first create a surface and add a Reflections Caster component to it, in order to cast the reflection from our Renderer and project it into a material.
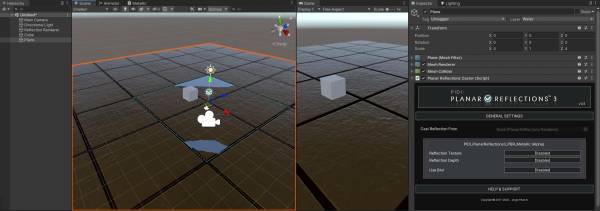
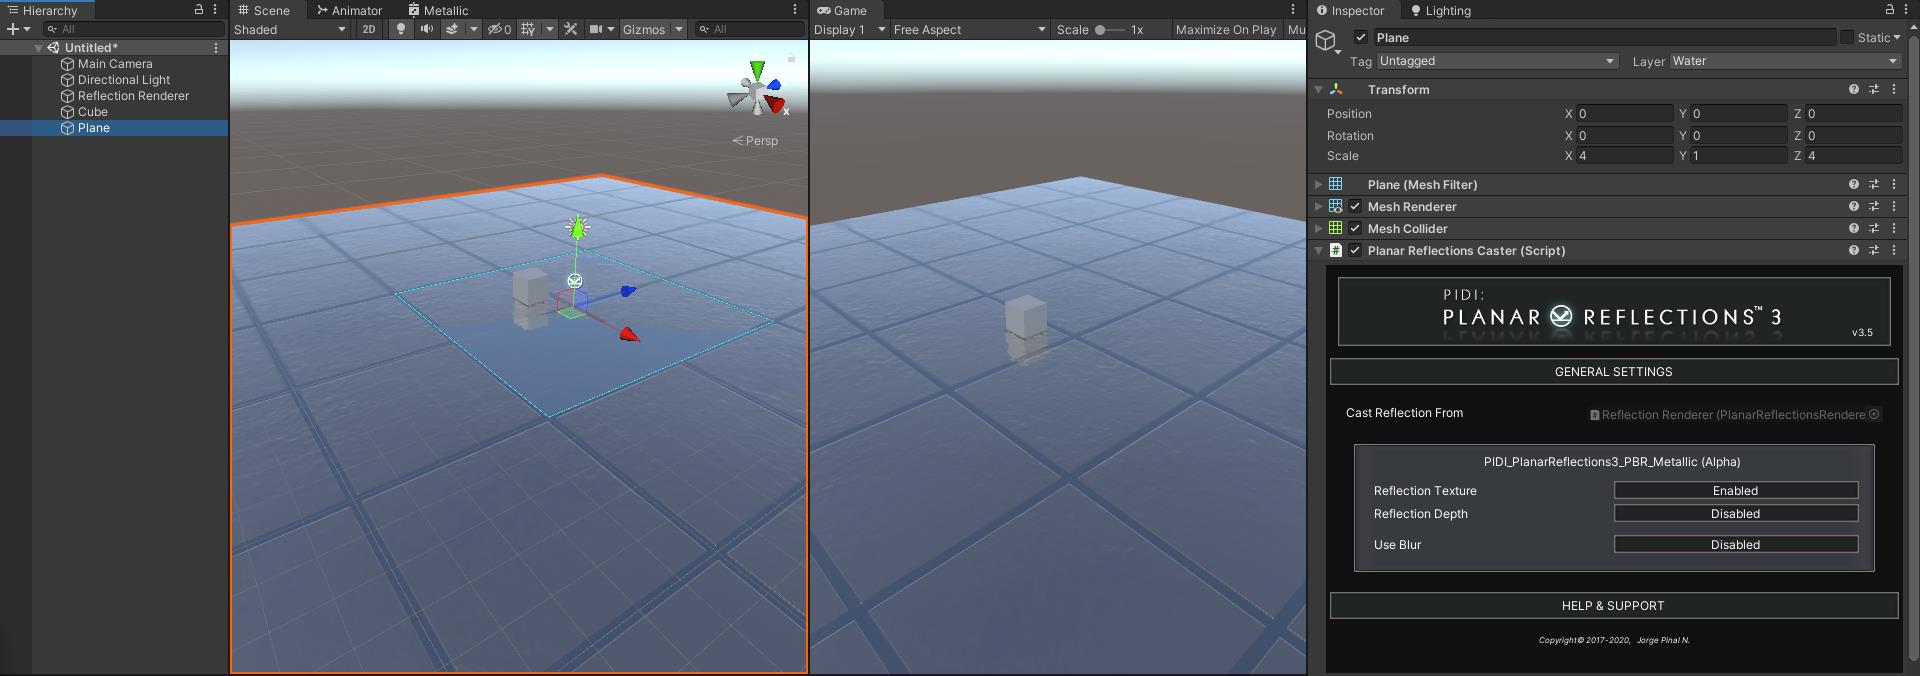
Let's create a standard Unity plane and place it in the center of the scene. We will make it bigger by giving it a 4,4,4 scale. Once it is created, we will add one of the default reflective materials included with the asset, in our case we will add the PBR Metallic material. After the material has been added and the plane is well placed in the scene, we will add a Planar Reflections Caster component to it.
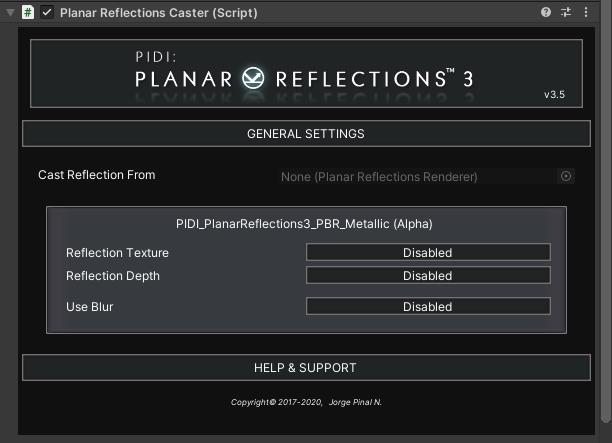
Open the General Settings tab from the PIDI Planar Reflections Caster UI and enable the Reflection Texture feature. This will make the caster read the Reflection Texture from a renderer and project it into a material. Each material from the Mesh Renderer has a small box with independent settings, allowing you to have meshes with multiple reflective materials.
Once this step is ready, drag the Planar Reflections Renderer we created before into the small CAST REFLECTION FROM slot in the Planar Reflections Caster component. This will immediately project the reflection from our renderer into the Caster surface. You have successfully added reflections to your scene.
Basic Shaders Upgrade Guide
At the moment of release, PIDI Planar Reflections 3 has a smaller collection of integrated shaders than PIDI Planar Reflections 2 had at the end of its life.
This was a conscious decision since it was released as new versions of the SRP rendering pipelines were quickly evolving and many of the version 2 shaders were being re-worked to be mobile-ready by default, without requiring multiple variants. Our new approach will be to add brand new shaders as well as ports of the old ones in smaller, progressive updates that can be approved faster and that can also keep up the pace of the evolving Universal RP and Lightweight RP as we progress.
However, if you want or need one of the older shaders to be compatible with PIDI Planar Reflections 3 the process is fairly simple and can be done within a couple of minutes.
Open any of the old shaders and search for a line with the following code :
This line is usually followed by another line of code that says “screenUV += dist;”. The main difference between how version 2 handled reflections and how version 3 handles them that may make the shaders incompatible is that version 3 has an inverted X coordinate. To fix this and make your old shaders compatible with version 3 you just need to add, between those 2 lines of code, a new one that inverts the X coordinate of screenUV as follows :
Following these simple steps every shader that you have used in version 2, even custom ones, will be ready to use with version 3 and all its features thanks to the consistent naming of parameters between versions. The first free shader pack for PIDI Planar Reflections 3 will be added through a small update on October 2019 with another one coming in mid November. Our aim is to provide at least a few new shaders every month to grow the collection.
Planar Reflections Renderer, Basic Settings
In the main UI of the Planar Reflections Renderer we can find several tabs with settings that allow us to control all the features from the asset.
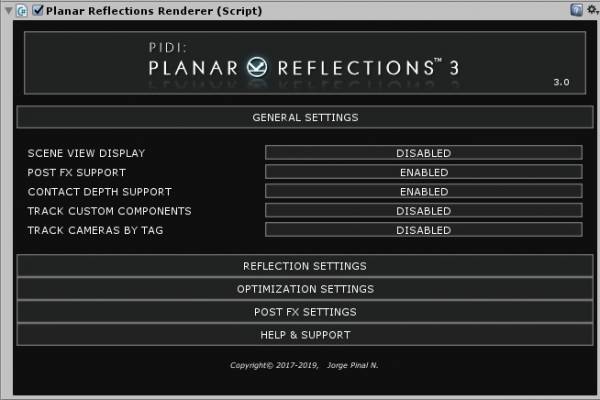
For this quick start guide we will only cover the most basic features and some general optimization and setup practices to help you get your reflections up and running in no time. First, we will open the GENERAL SETTINGS tab.
The SCENE VIEW DISPLAY setting enables or disables the preview plane from the Scene View. This plane displays the reflection as it will look in the game in the most simple way, without any additional effects nor tint. This is very useful when you are building a level as it will allow you to quickly see how your reflections will work and to locate them in the spaces where it makes most sense. This plane is NOT visible in the main game.
The TRACK CAMERAS BY TAG setting is a very useful optimization feature that allows you to only render the reflections for cameras that have a specific tag, giving you more control over the way the reflections will be handled.
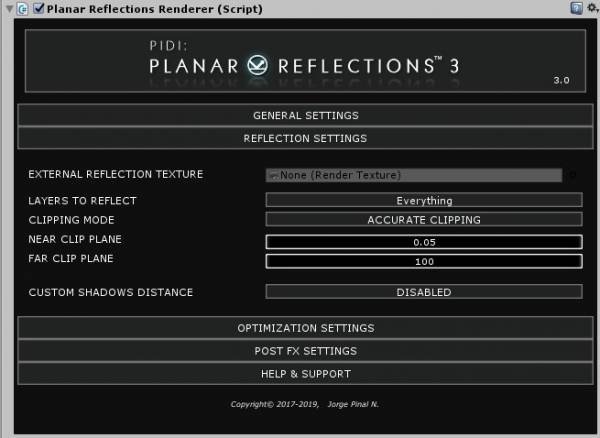
Inside the REFLECTION SETTINGS we can find additional controls for the different properties of the reflection and to control how will it be rendered.
The LAYERS TO REFLECT setting controls which layers of objects will be visible to the reflection. This feature makes it easy to adjust the performance of the reflection by limiting the amount of objects (and draw calls) it renders.
The CLIPPING MODE controls the projection itself, the way the clipping planes of the reflection camera will adjust to the reflective surface. The ACCURATE CLIPPING mode will prevent any objects behind the reflective surface from rendering by accurately making the near clipping plane match the reflective plane. SIMPLE APPROXIMATION will use the standard clipping planes and, while it will not prevent objects behind the reflection from being rendered, it will enable support for more complex features such as using a different Rendering Path, a depth pass, post process effects and more.
The clipping planes will help you to better control the distance in which objects are reflected, and an additional setting to provide a custom shadow distance for the reflections which can even let you, if used correctly, disable the shadows on the reflective surfaces and greatly improve the performance.
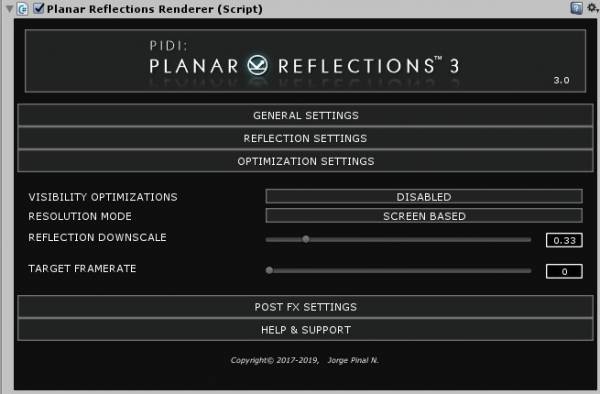
In the OPTIMIZATION SETTINGS tab you can control the way the resolution of the reflection is calculated, either based on the screen size or a specific value as well as how it will be downscaled for additional performance. The VISIBILITY OPTIMIZATIONS setting modifies the way the reflection works, ensuring it is only rendered if a Reflections Caster using it is visible to a Game Camera.
The TARGET FRAMERATE allows you to control the way the reflections are updated, limiting its frequency to match either the actual frame rate of your game (if you set its value to 0) or a specific frame rate between 1 and 60 frames per second.
PIDI : Planar Reflections 3 - Advanced Topics
PIDI Planar Reflections 3 is much more than a simple reflections system. In this section of the documentation we will cover advanced use cases for this asset, how to use the Water Add on, the integrated Post FX support, custom shader creation and much more that will take the reflections in your scenes to the next level.
Movable Reflective Surfaces
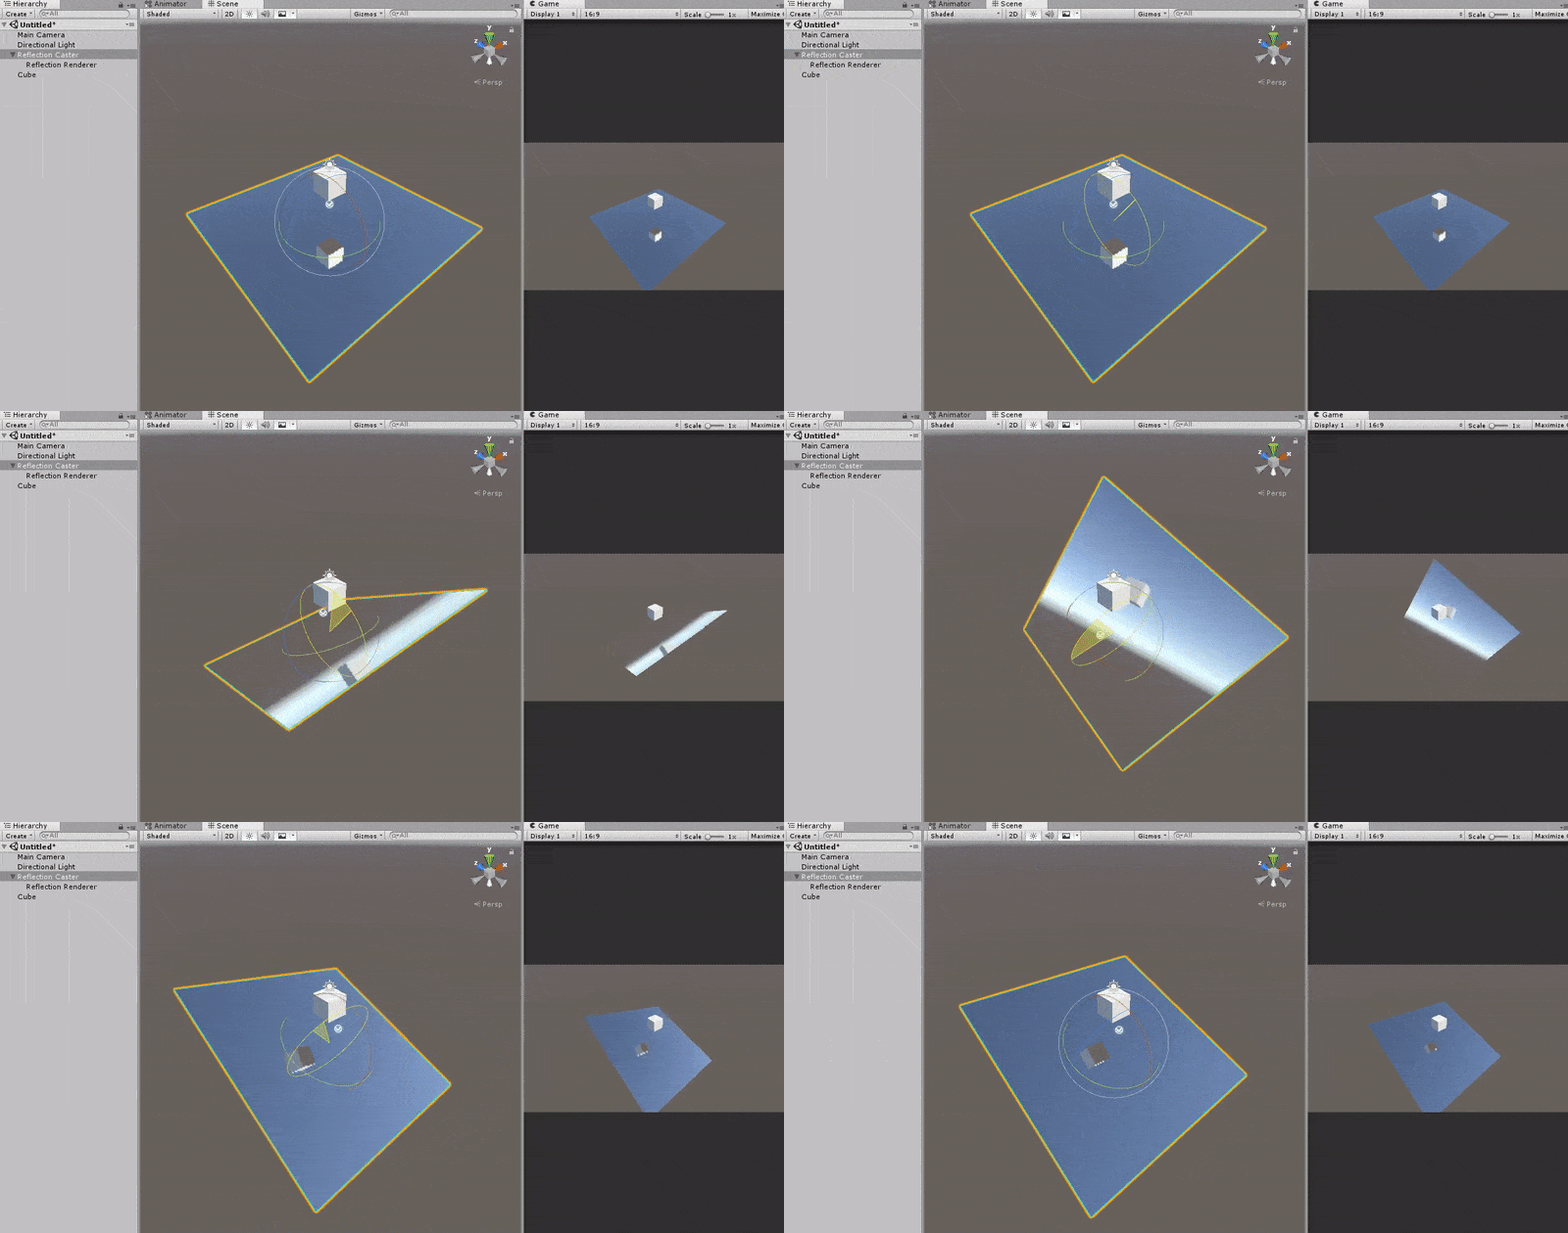
Sometimes it is useful to have reflective surfaces that can rotate and move freely in the scene, maybe as a mirror that a character will carry around, maybe as a moving floor or wall in a puzzle game.
The easiest way to solve this is through clever level design and objects management, by creating a Reflections Renderer for each dynamic surface and then making it a child object of the Reflection Caster itself. This way the reflections will move along the caster and rotate accordingly while also providing a lot more flexibility over the reflection's position and rotation relative to the surface that casts it.
To ensure a high performance, make sure to enable the VISIBILITY OPTIMIZATIONS feature of the Reflections Renderer to ensure that it only renders the reflection when the caster itself is visible.
Post FX Support
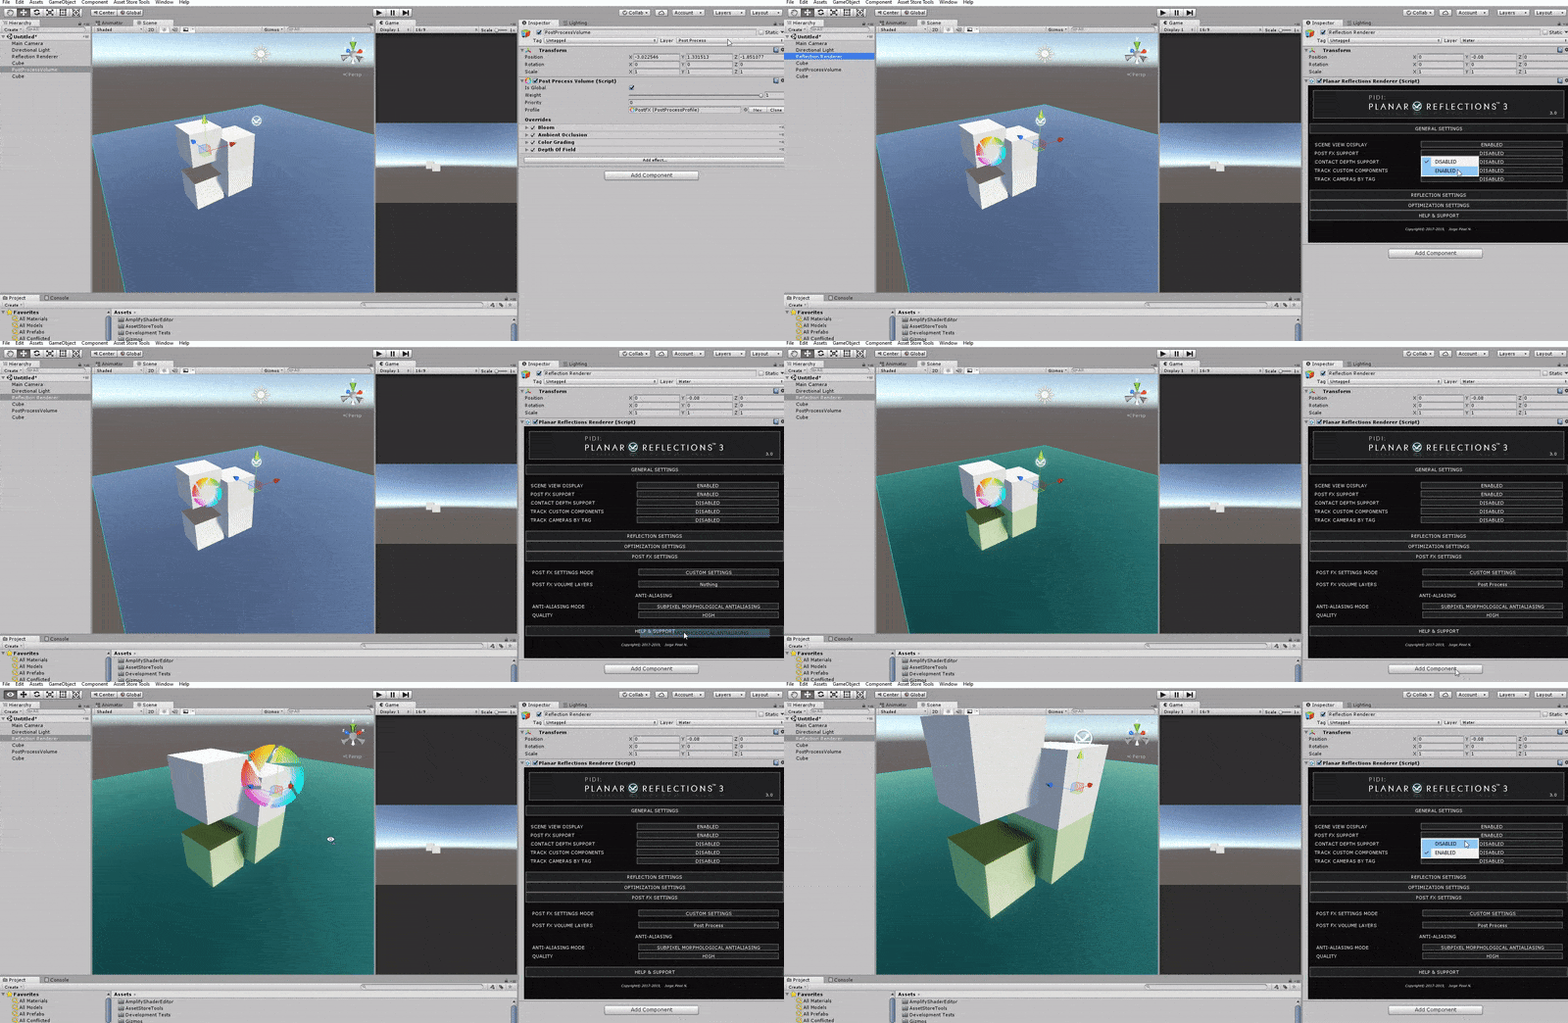
PIDI : Planar Reflections 3 comes with integrated support for the Post Process Stack v2.0 and the new Post Process system used in the Universal RP for Unity 2019.3. This new integrated support allows you to add Post Process Effects to your reflections in just a few clicks.
To enable Post FX support simply enable the corresponding setting in the GENERAL SETTINGS tab from the main UI of your Planar Reflections Renderer. An additional tab of settings called POST FX SETTINGS will appear.
There are two ways in which the Post FX can be set up for the reflections, either copying their settings from the camera that is looking at the reflection or with specific settings for each reflection.
In most cases it will be best to set up specific settings for each reflection since not all the Post Process FX assigned to the standard Game Cameras will work correctly in the reflections. Any effect that depends on motion vectors (such as TAA, Motion Blur) or that depends on screen coordinates (Vignetting) may not work correctly within the reflection.
Some other effects may be to expensive to compute and not necessary for the reflection itself, such as SSR or depth of field effects. In these cases, having a specific collection of Post FX Volumes for the reflections and separate from those for the game itself may make sense.
Reflection Depth Effects
In some cases you may need to access the depth pass of the reflection, which stores the distance from the different reflected objects to the reflective plane in the green channel, for many different effects such as to generate an accurate mask that allows you to mix real-time and static (or baked) cubemap based reflections.
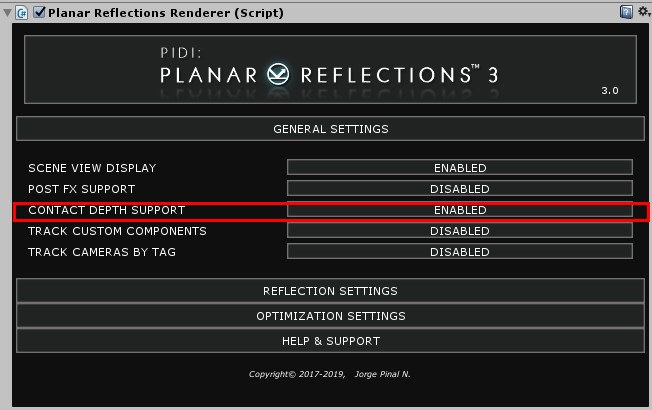
PIDI Planar Reflections 3 makes this process extremely easy by allowing you enable the depth features of the Reflections Renderer with just a toggle, the CONTACT DEPTH SUPPORT toggle.
Enabling this feature will render an additional pass for each texture and store it in a _ReflectionDepth texture that can be used by different shaders to simulate a whole new range of effects. The texture contains the distance of each object relative to the surface of the reflective plane stored in a negative green space (the further away the objects are the greener the color gets and the closer the objects are the blacker the color) with the background and spaces without any objects being rendered in full green color.
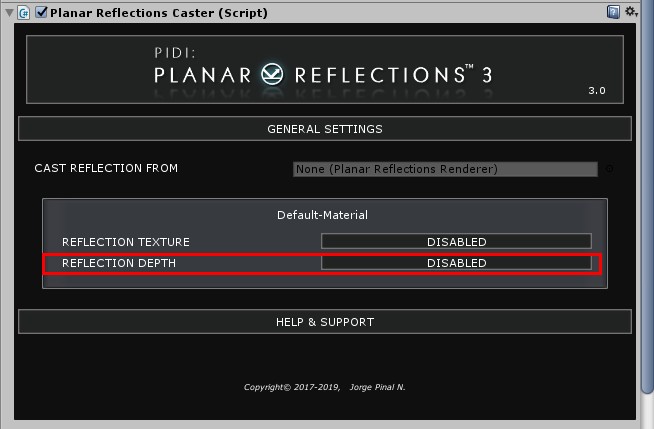
To make a Reflections Caster use this depth texture and send it to the materials you just need to enable the REFLECTION DEPTH toggle in the Reflections caster component for the corresponding material.
Blurred Reflections Pass
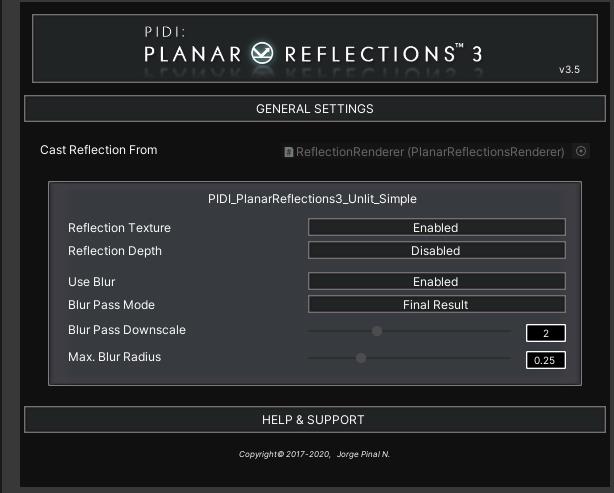
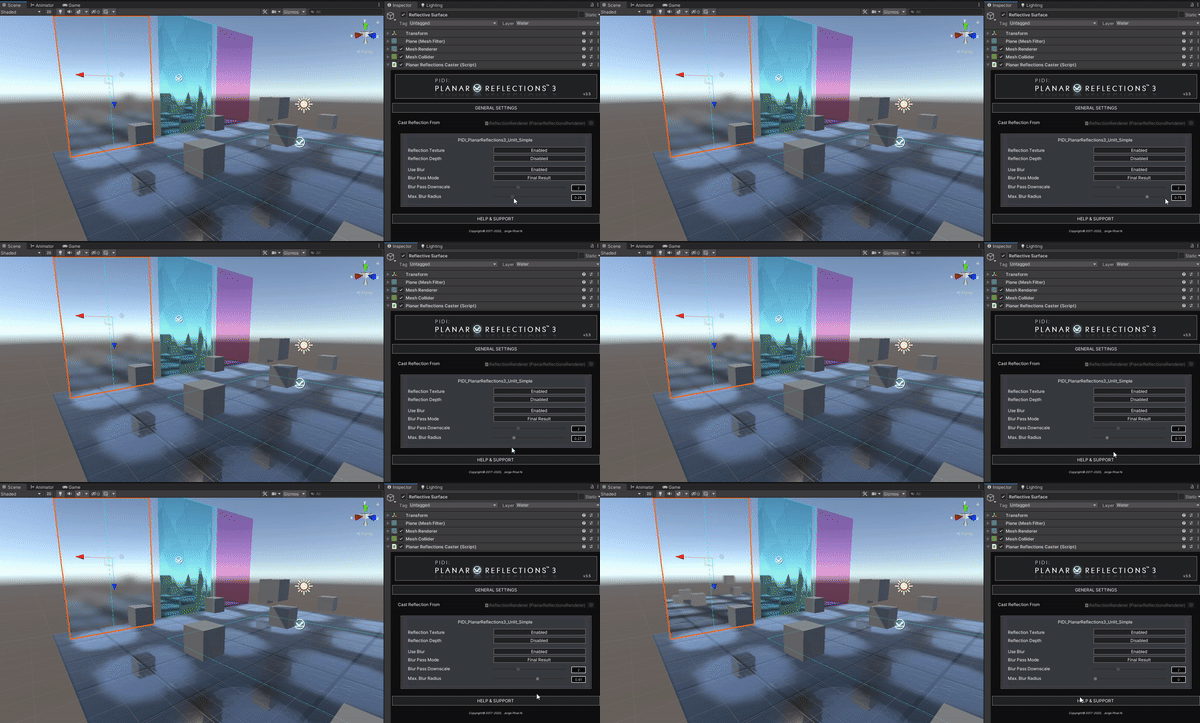
Starting with version 3.5, PIDI Planar Reflections 3 includes a new feature called “Blur Pass”. This feature allows you to apply a high quality Gaussian Blur filter to the reflections rendered by the asset right before assigning them to the material. This blur pass is applied by the caster on a per-object and per-material basis.
There are two ways of applying this blur pass, either to the Final Result of the reflection rendering process or as a separate pass to be stored in a new texture2D parameter called “_BlurReflectionTex”. Using the Final Result mode will work with any shader compatible with our reflection system while the Separate Pass mode requires additional work to implement the new _BlurReflectionTex parameter and how its contents will be used. All the included PBR shaders in all rendering pipelines implement and work best with a Separate Blur Pass.
Create Custom Shaders
While this guide will not provide any assistance in how to create shaders (there are far better resources to learn how to do this) we will cover here the basics of which parameters are needed in order to process the reflections as well as how should their coordinates be calculated in order to project them over a surface.
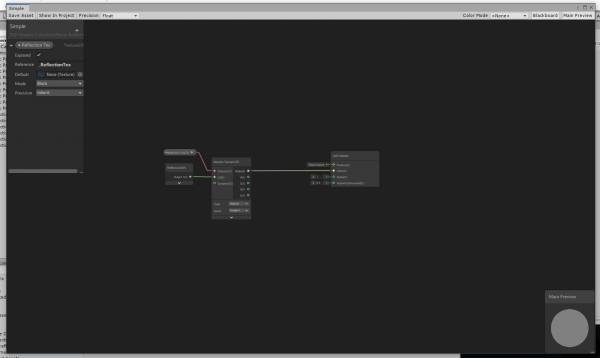
The main parameter needed for the reflections is a sampler2D parameter named _ReflectionTex. This will receive the output texture from the Reflections Renderer through the Reflections Caster. This texture comes ready to be projected using screen coordinates with an inverse X.
This is, screen based UVs whose X has been flipped by doing screenUV.x = 1-screenUV.x
Additionally, your shaders can also read the reflection's depth if it is being rendered and cast as an additional texture which stores the depth of the reflected objects in an inverse green channel (the greener the color the further away the objects are). This depth will be sent to a parameter called _ReflectionDepth. Adding this parameter to your shaders will allow them to use this feature, and the coordinates used to project it are the same as those of the standard reflection color.
For LWRP and Universal RP shaders we recommend you to use Shadergraph as it will provide you great compatibility between different versions with little maintenance required. To ease the creation of custom shaders that use PIDI Planar Reflections we have provided a small subgraph called “ReflectionUVs” which already outputs the correct coordinates to project the reflection texture, requiring you only to plug it to a Sample 2D Texture Node which has the _ReflectionTex parameter assigned (make sure that the parameter's reference name is _ReflectionTex or it will not be recognized by the Planar Reflections system).
